Add lights
The term Lights in the app refers to any mains powered luminaire with a built-in sensor, transceiver or wireless driver. It also refers to other mains powered devices such as Smart T-LEDs, smart lamps, switch relays, SR bridges or DALI extenders connected to a wireless sensor or transceiver, and mains powered sensors with a DALI interface (MPS-DALI). Lights can be added to either a group or a zone.
There are two distinct ways to add lights using the mobile app.
-
Add lights via Bluetooth Low Energy method - This method is the recommended way to add lights.
-
Add lights via Zigbee auto-join method - This method is only possible with certain devices and only when a gateway is assigned to the network. This method also requires careful planning and is generally not the recommended way to add lights that support Bluetooth.
Add lights via Bluetooth Low Energy (BLE) method
All Gen 2 Interact ready devices (BLE enabled) support this method. Perform the following procedure to add lights via BLE.
-
Go to the physical location of the group/zone where you would like to add lights and ensure that the lights are energized.
-
Luminaires with wireless drivers, Smart T-LEDs, smart lamps, non-Interact luminaires connected to SR Bridges, switch relays or DALI extenders should be ON at full brightness.
-
Luminaires with built-in sensors should be ON at full brightness and each sensor’s LED indicator should turn from yellow to red when it detects motion and from red to yellow after motion is no longer detected.
-
Luminaires with DALI drivers connected to a mains powered sensor with a DALI interface (MPS-DALI) sensor should be ON at full brightness. Each MPS-DALI sensor’s LED indicator should turn from yellow to red when it detects motion, and from red to yellow after motion is no longer detected.
-
-
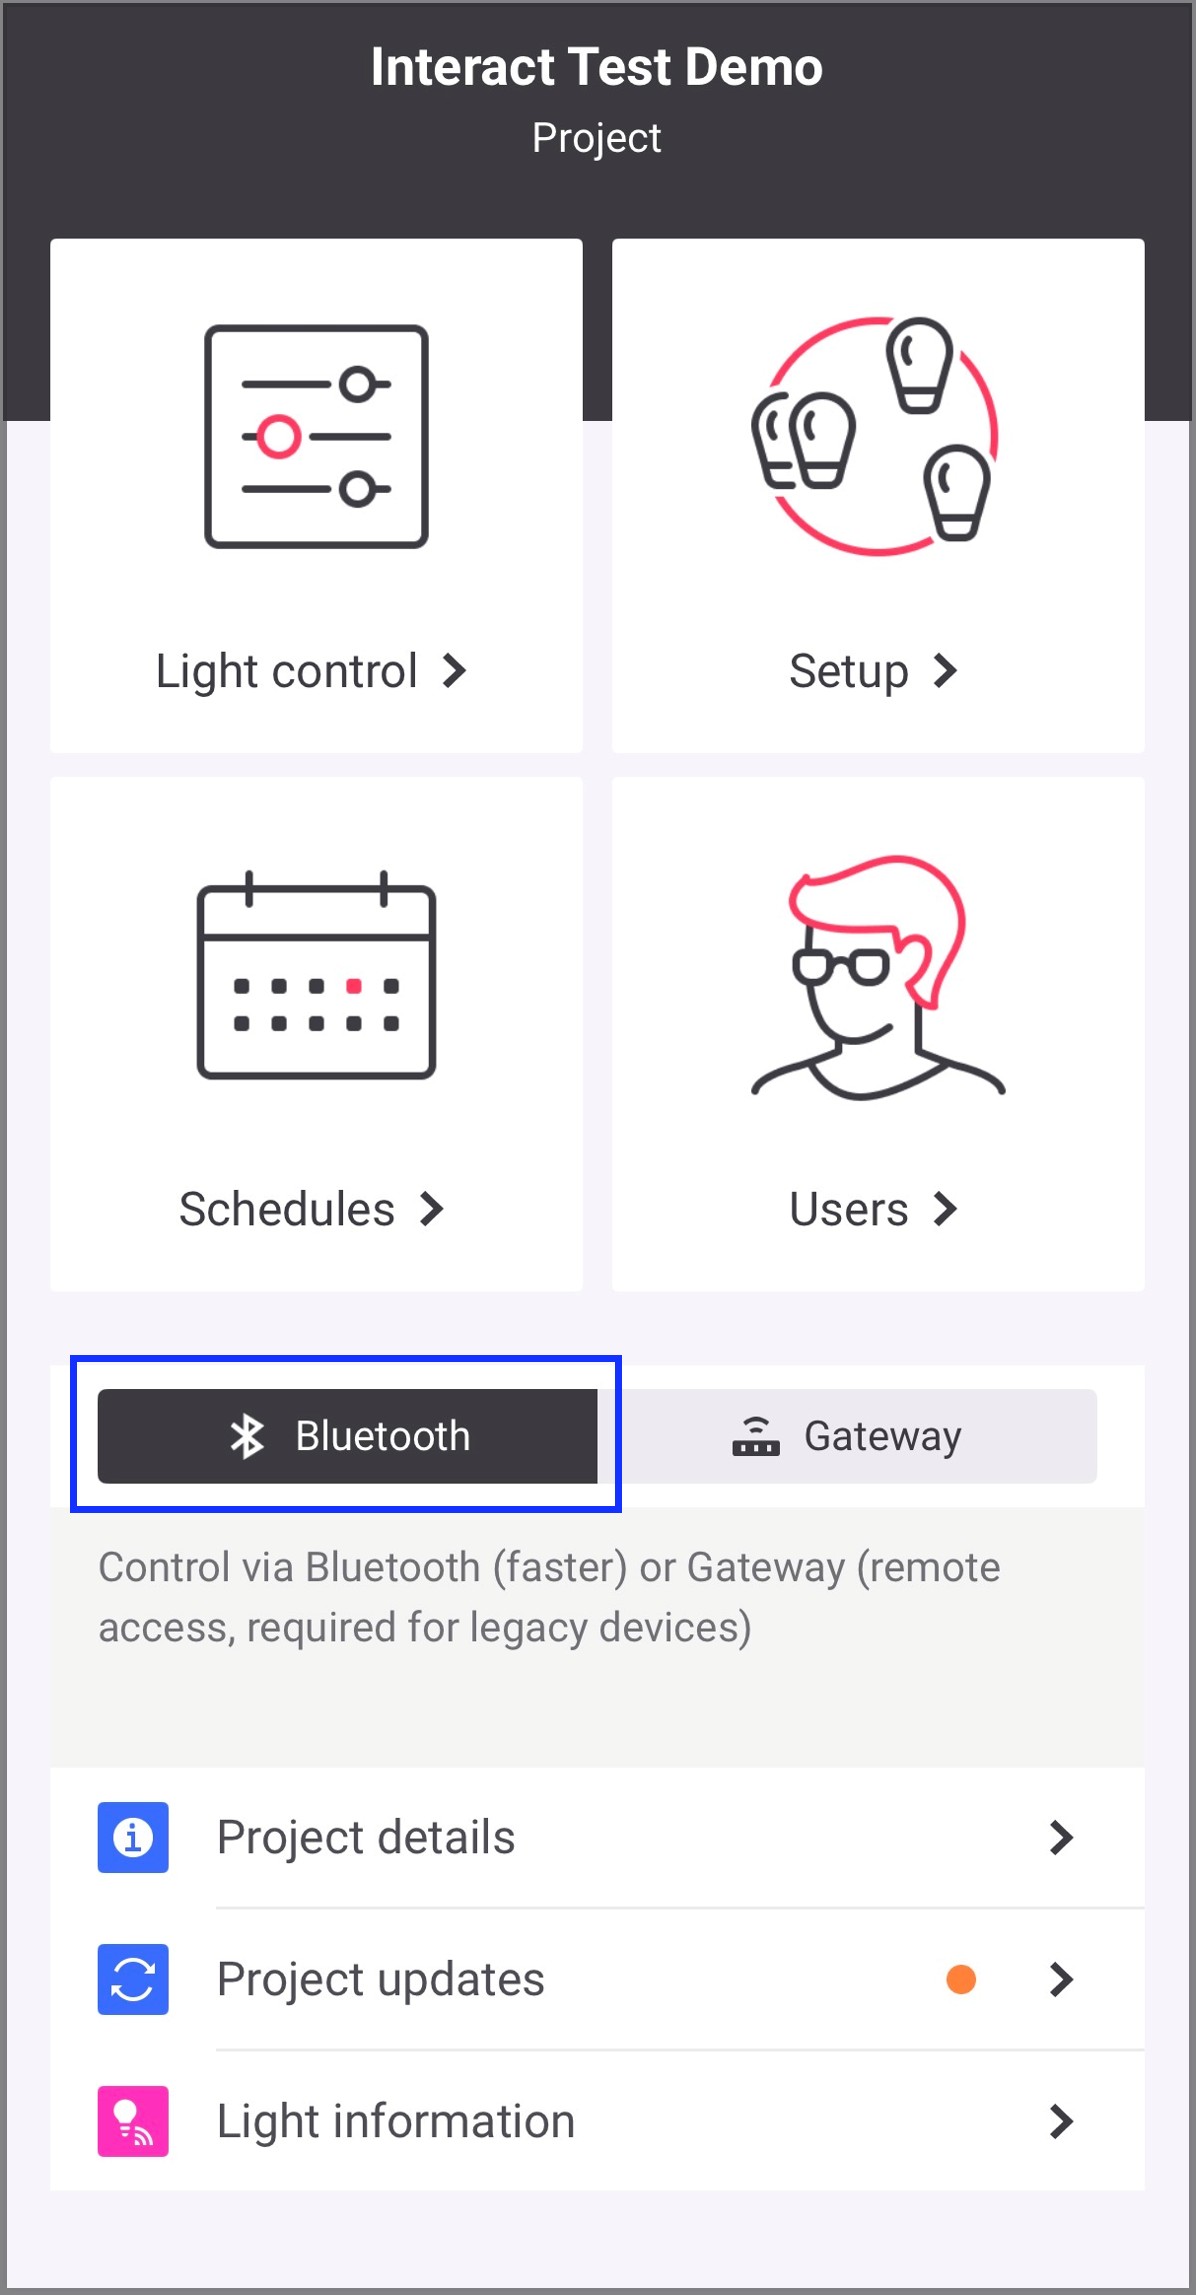
Open and log in to the mobile app. Navigate to the appropriate project and select the Bluetooth mode in the Project screen.
-
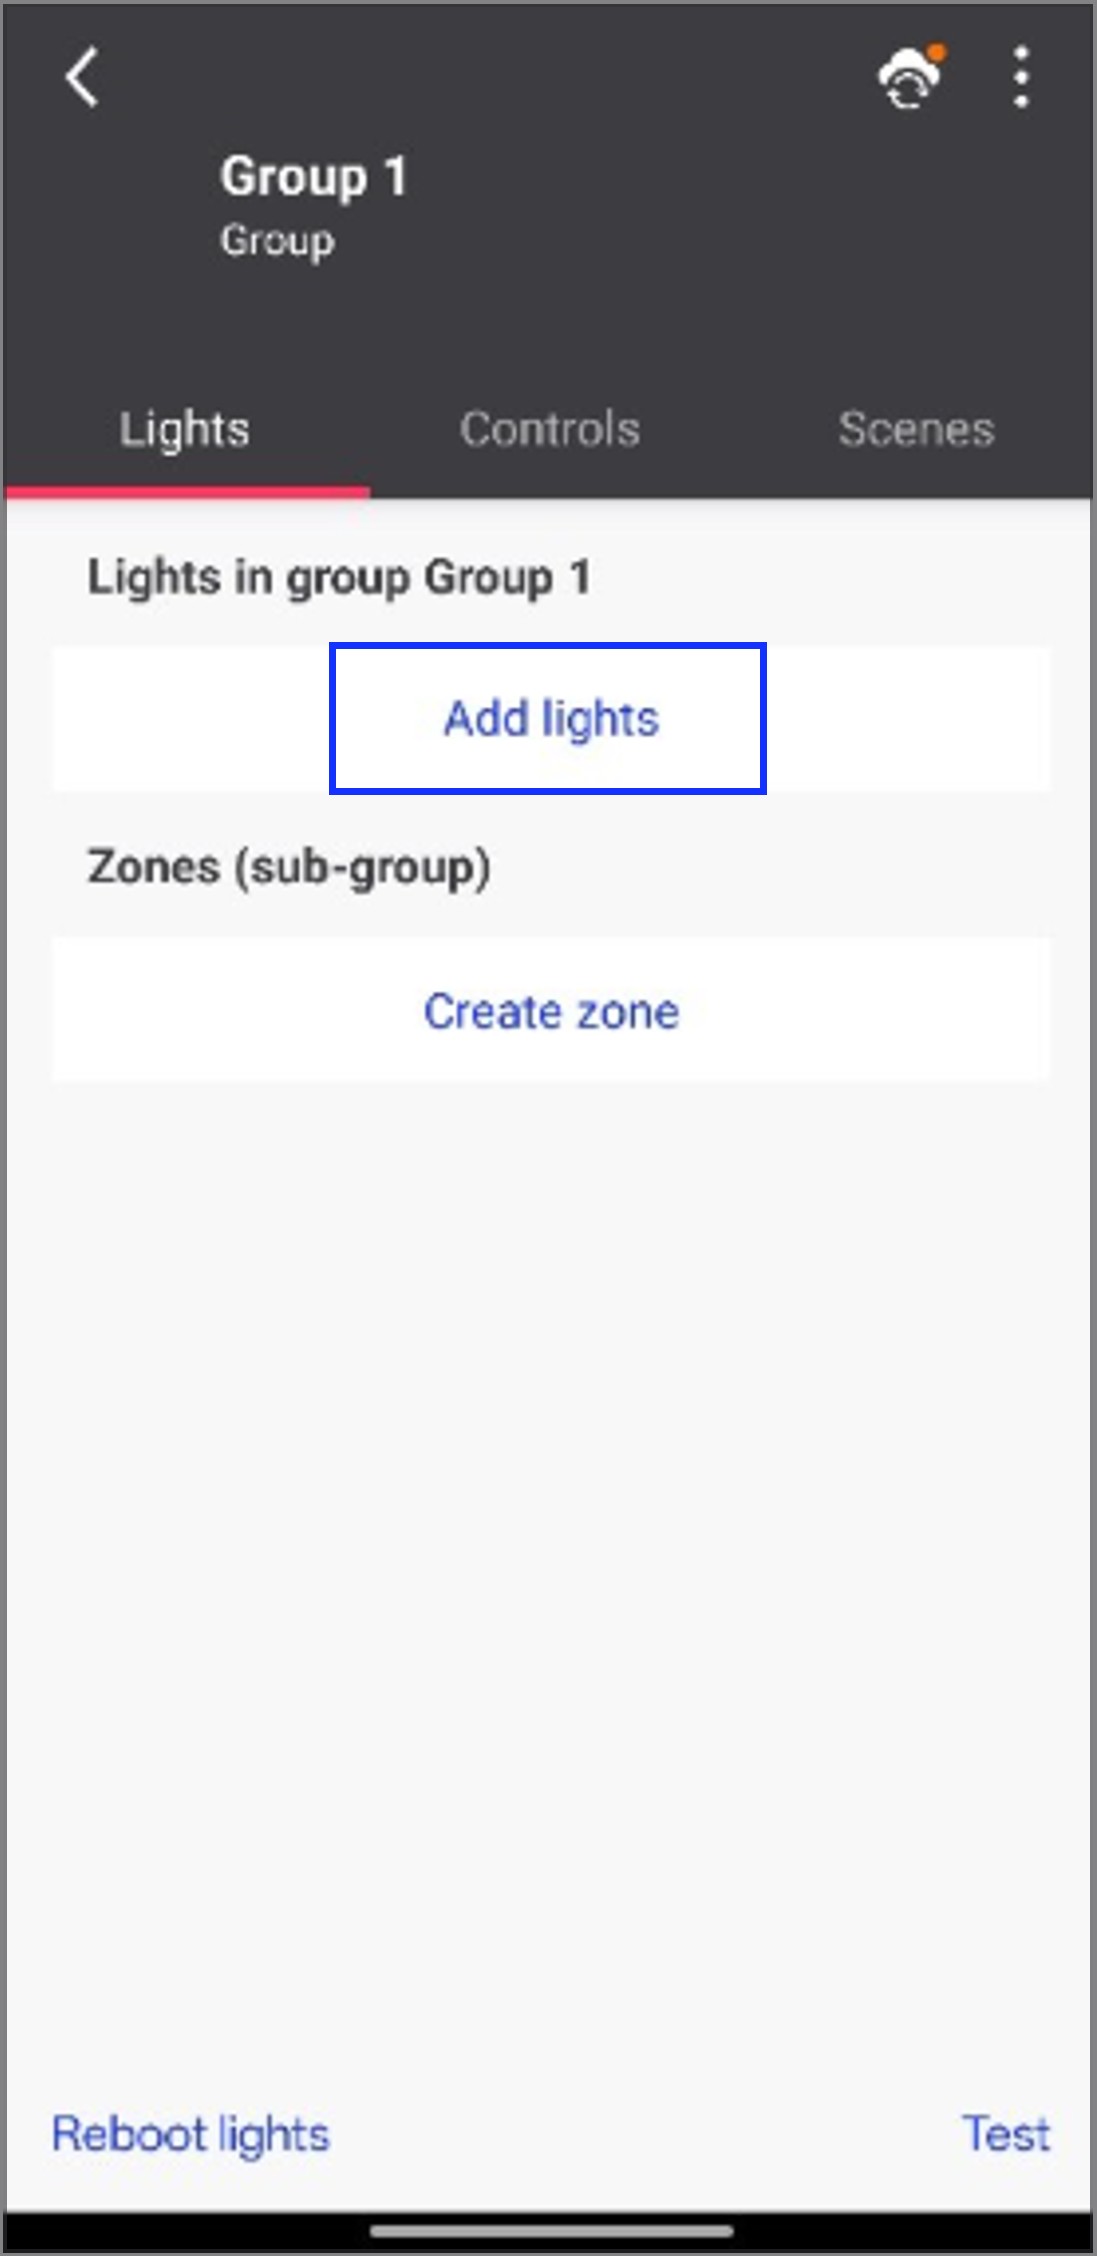
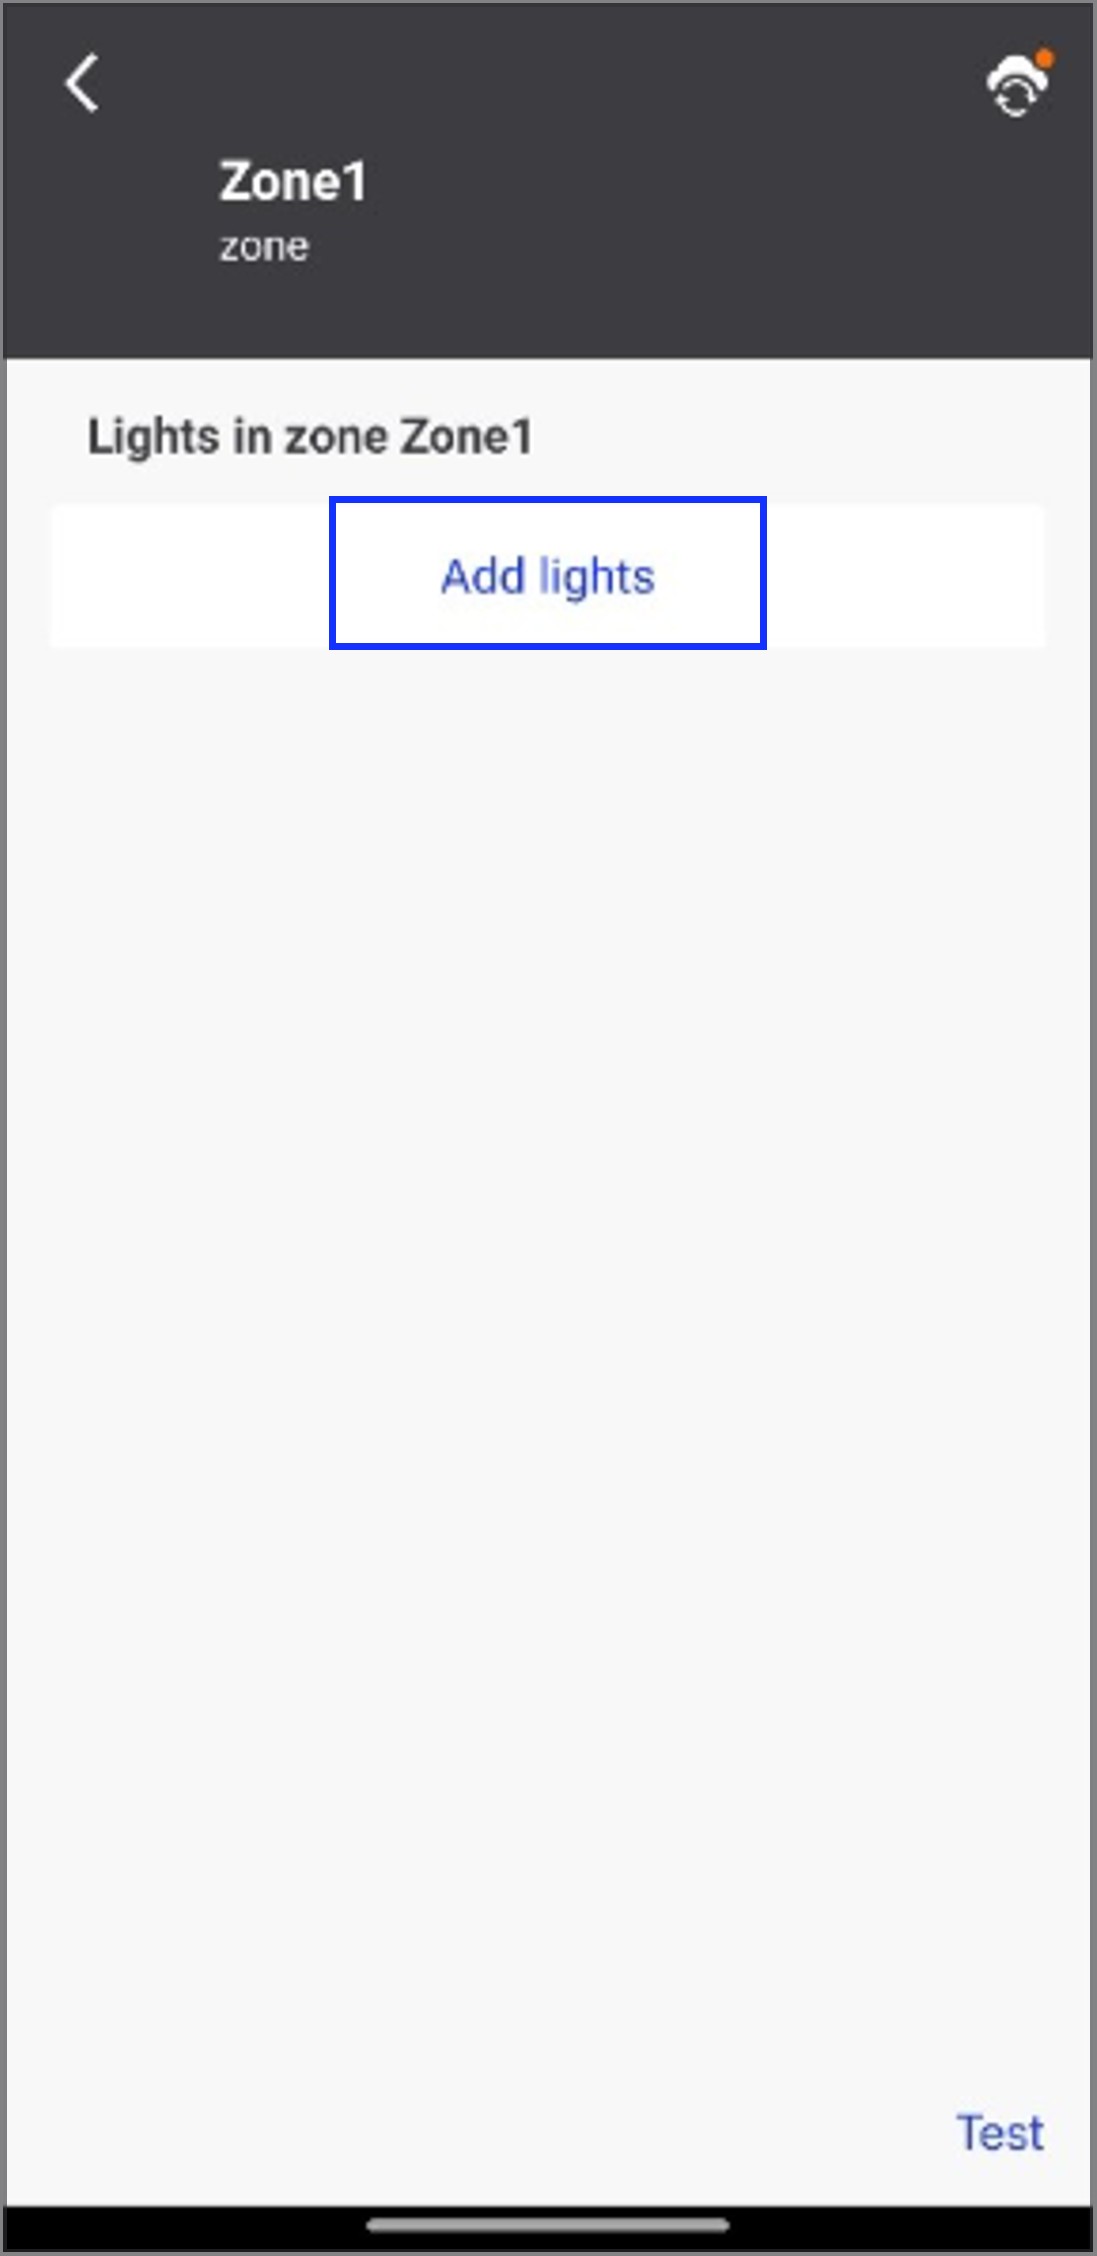
Navigate to the project Setup screen and select the appropriate wireless network, then tap Start on the network screen to start commissioning. Tap the group where the lights are to be added. If the lights are to be added to a zone in the group, tap on the appropriate zone.
-
Tap Add lights.
-
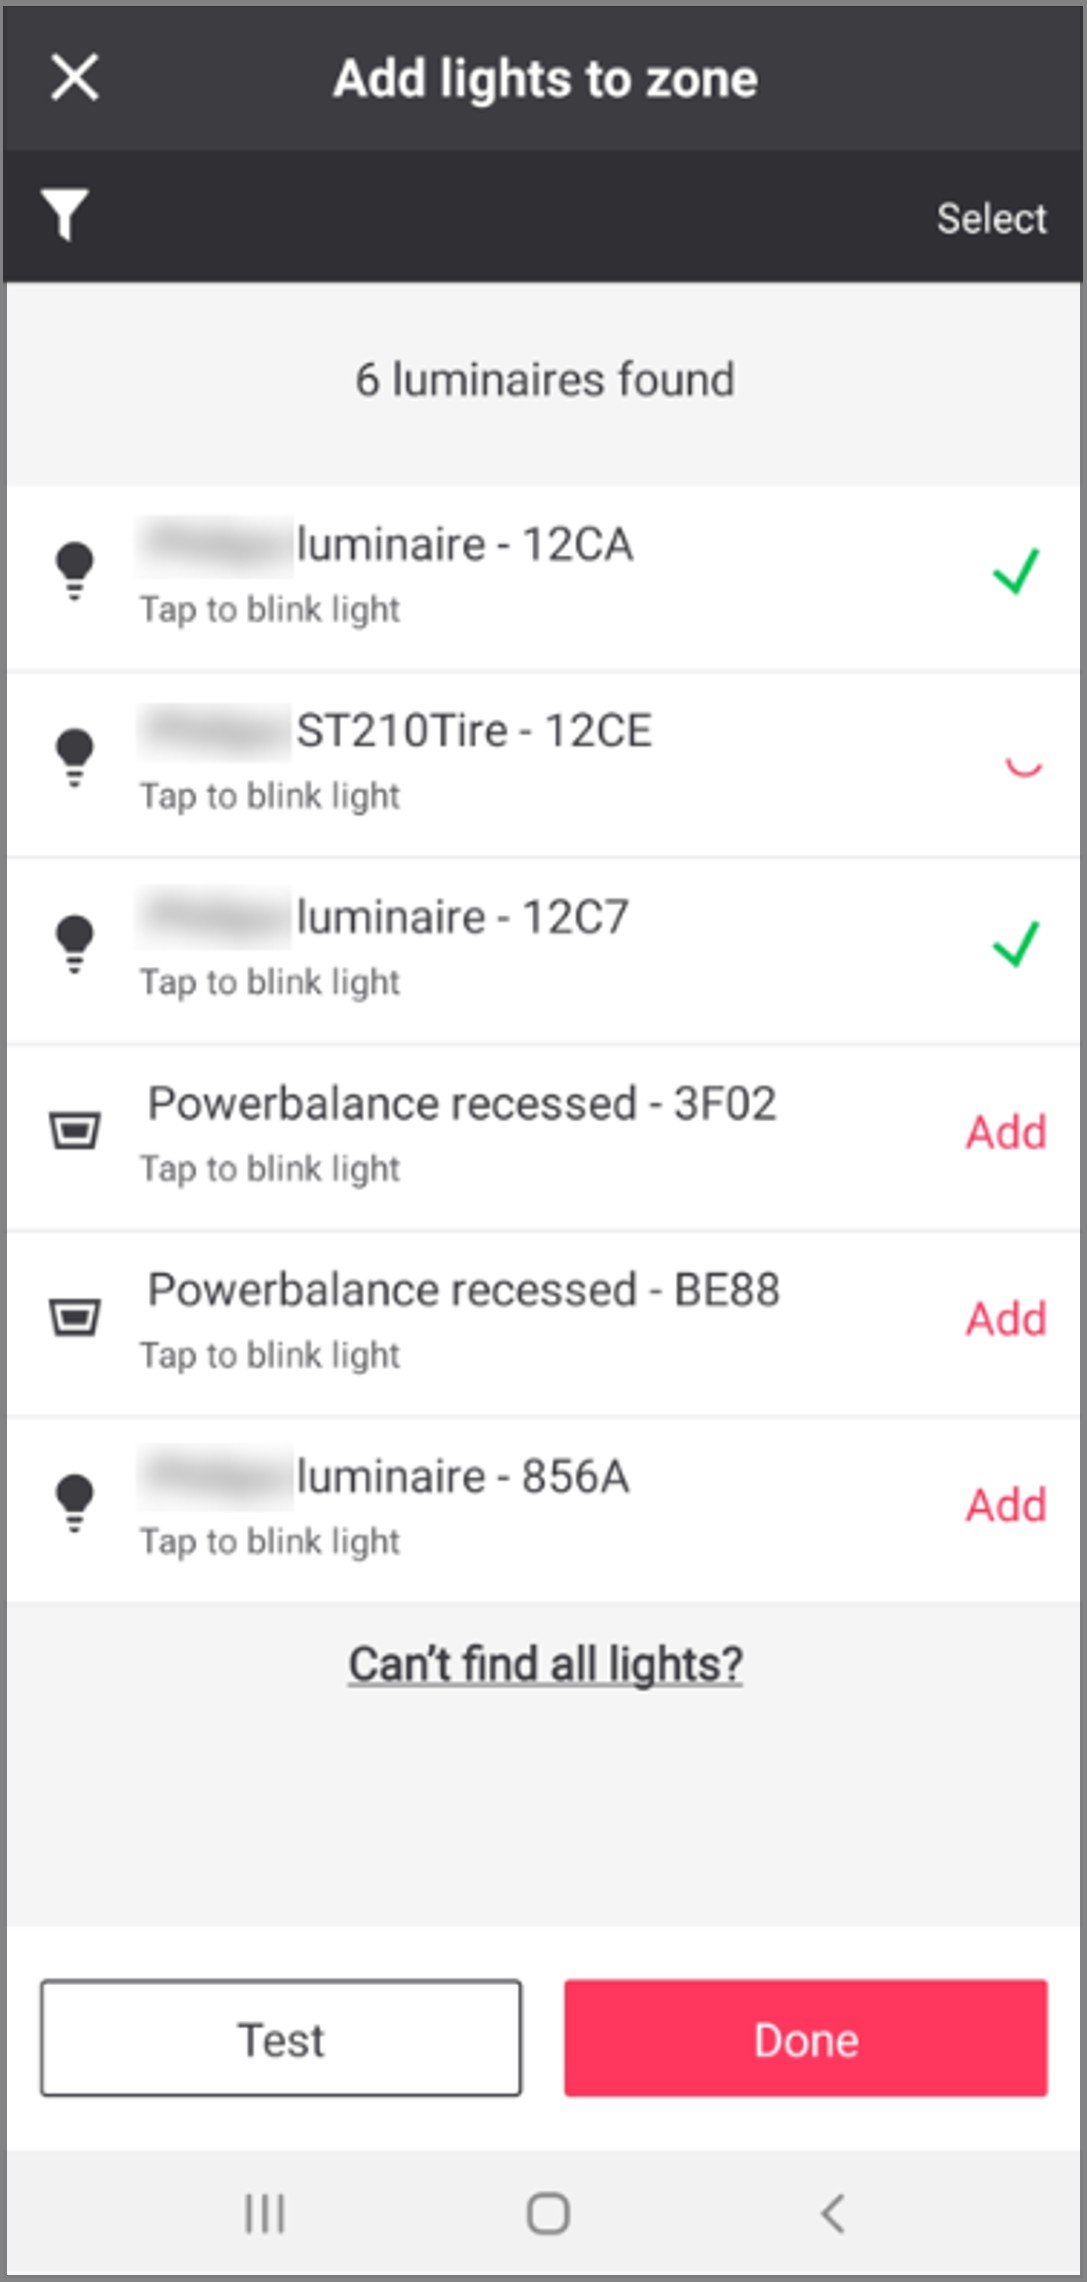
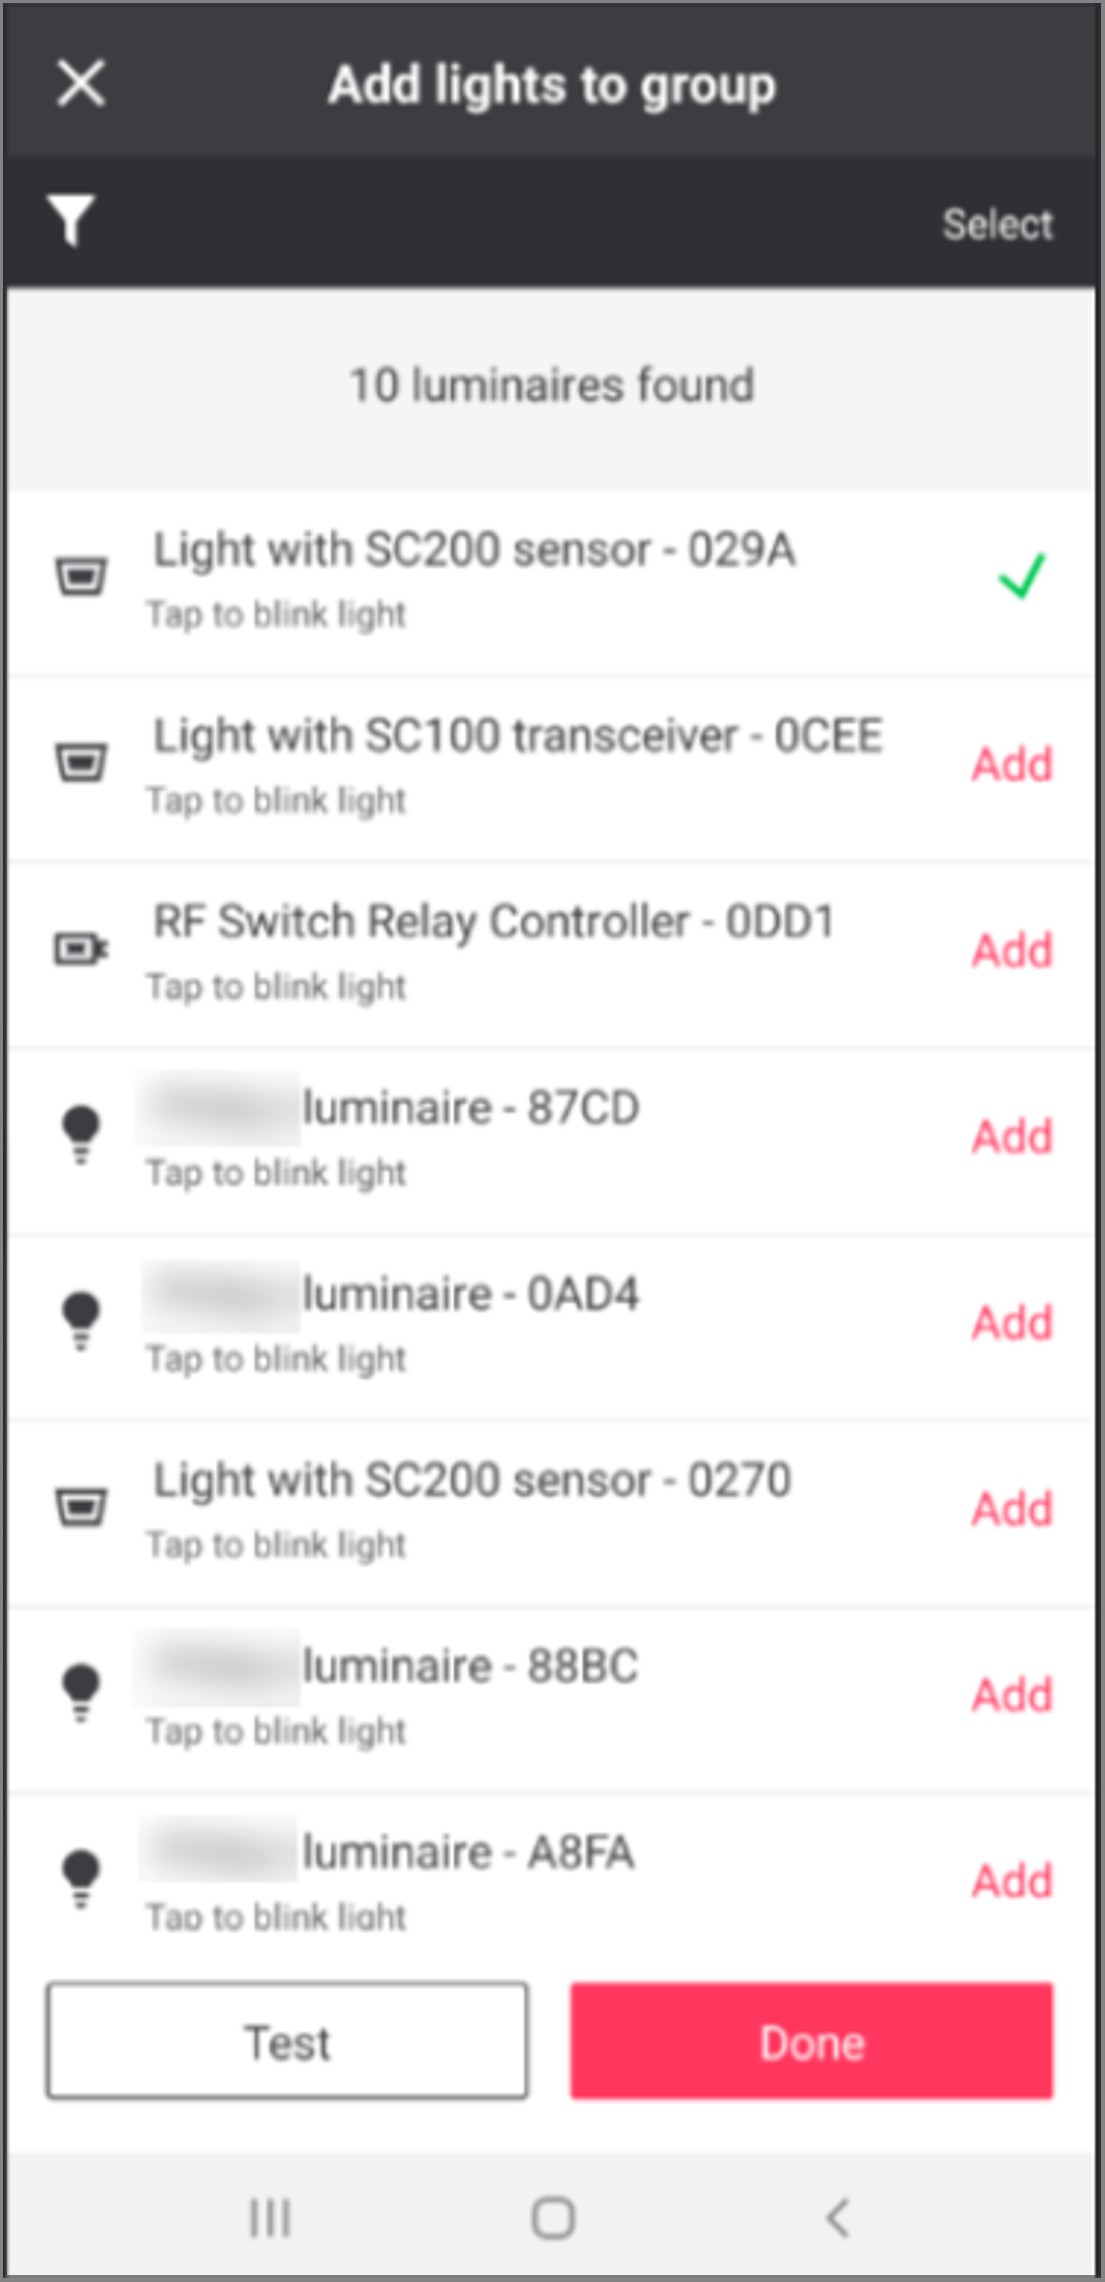
Wait approximately 10 seconds for the lights to populate on your screen. During this time, the app is scanning for lights in BLE range of the mobile phone that have not been added to a wireless network yet.
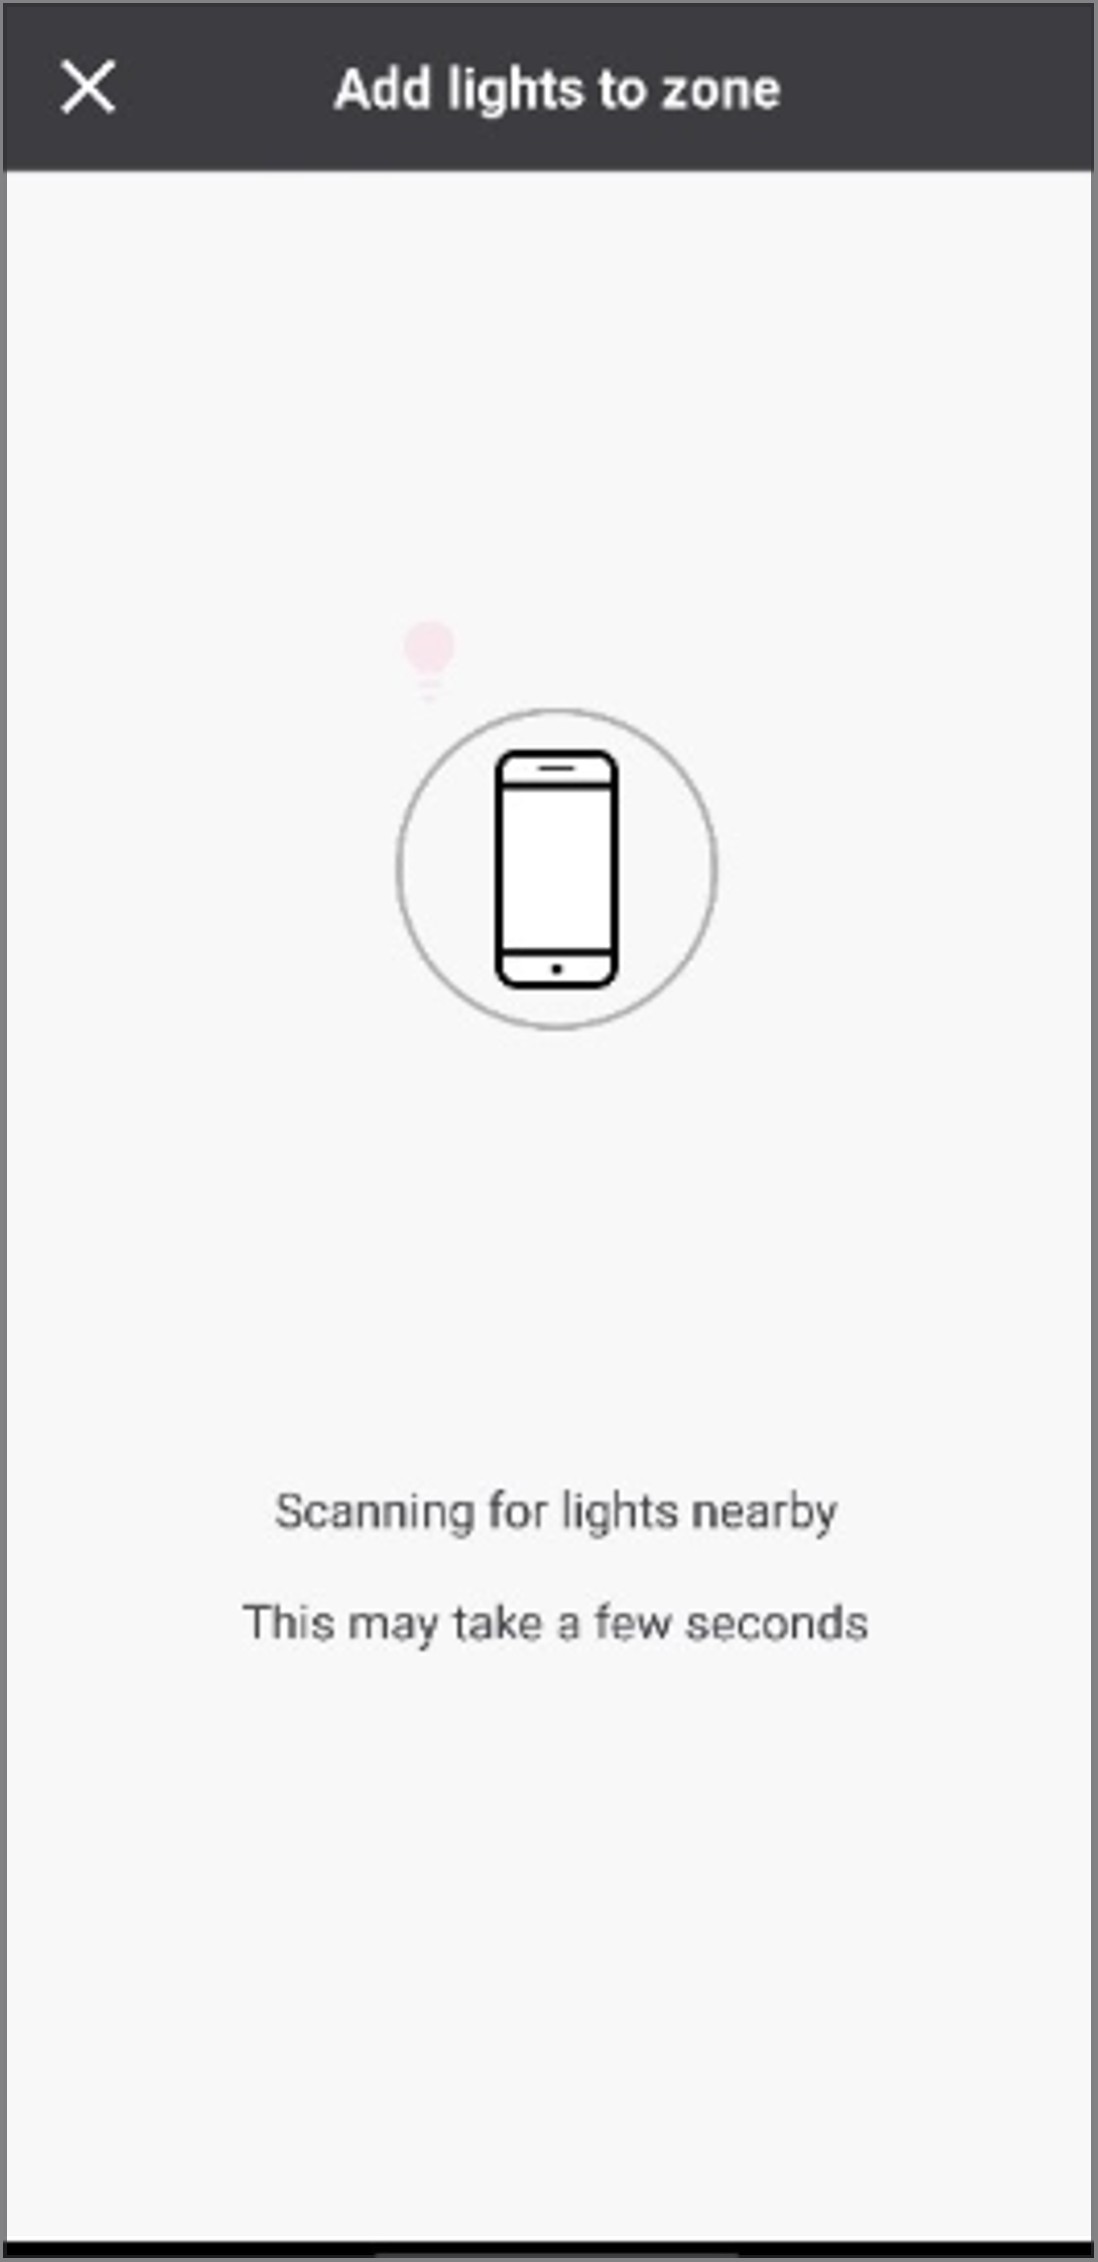
Result: You will see the list of lights within BLE range of the mobile phone on the app screen. The list is in order of BLE signal strength (strongest at the top of the list). In general, the lights at the top of the list are usually the closest physical lights to the phone.
-
Some lights are equipped with infrared (IR) receivers (luminaires with built-in sensors or transceivers, and Smart T-LEDs). If the IR receivers are visible (refer to System Guide for more details), you can optionally use an IRT9090/01 or IRT9015/00 IR remote control to trigger and add them. This enables you to add lights in a controlled order instead of blinking them in the scan list first to determine if they belong in the group. To use the IR remote:
-
Stand directly under the light.
-
Point the IR remote control straight up, directly at the IR receiver and press add (for IRT9090/01) or + (for IRT9015/00). The light will blink several times in response to the IR remote and the corresponding light in the app will move to the top of the scan list. When accidentally pressing 0, the device does add to the group or zone, but is immediately reset, resulting in a non-operational device. In that case, delete the device from the app and assign it again.
-
Only lights with firmware version 8.x.x or higher can be added to Light behavior V2 groups.
-
Do not walk away while adding lights. Be patient and allow the light to finish adding before moving to the next light. You will see a green checkmark beside the light and the mobile phone will emit an audible beep sound when the light is added successfully.
-
-
If the light does not appear as assigned, try linking it again or power cycle the light.
-
The app supports adding multiple lights simultaneously. Adding too many lights simultaneously will result in failing assignments. Depending on your mobile device and Bluetooth signal strength, the amount of lights that can be simultaneously added will vary.
-
-
For lights without IR receivers (luminaires with wireless drivers, switch relays), or if the IR remote cannot see the light’s IR receiver, or if you simply prefer to add lights using the blinking method instead of using the IR remote: (refer to System Guide for more details).
-
Tap a light icon in the scan list. The corresponding light will blink several times. If the light that blinks is physically located in the group or zone that you would like to add to it, tap Add beside the light. If the light does not belong in the group, move to the next light in the list and repeat this process.
-
Only lights with firmware version 8.x.x or higher can be added to Light behavior V2 groups.
-
Do not walk away while adding lights. Be patient and allow the light to finish adding before moving to the next light. You will see a green checkmark when the light is added successfully.
-
-
If the light does not appear as assigned, try linking it again or power cycle the light.
-
-
Tap Test at any time when adding lights. This brings up a screen with an on/off toggle button. Tap the button to turn off/on all the lights in the group to ensure that the lights respond and to check if you have added the correct lights to the group.
-
Tap Done when all the lights are added to the group/zone.
Add lights via Zigbee auto-join method
Adding lights via Zigbee auto-join method (called as Discover lights in the mobile app) is only possible when you have assigned a wireless gateway (refer to Add gateway section) to the network and is only supported by certain devices.
Gen 1 devices (BLE not enabled) that only support Zigbee auto-join method and cannot be added via BLE method are:
-
SNS441
-
Gen 1 wireless drivers
-
Gen 1 Smart T-LEDs
Gen 2 devices (BLE enabled) that support both Zigbee auto-join method and BLE method are:
-
Gen 2 wireless drivers
-
Gen 2 Smart T-LEDs
The Zigbee auto-join method requires careful planning and coordination. A powered, unassigned Zigbee device will automatically connect to the first available Zigbee network within its range. For this reason, you must be cautious when opening a wireless gateway to discover lights.
If any unassigned devices that you do not intend to include remain powered on, they may be unintentionally added to the network. This can lead to additional time and effort to diagnose, reset, and rediscover those devices within the correct network.
Therefore, unless you are specifically using only Gen 1 devices (older projects and devices), it is highly recommended to use BLE to add lights instead of using the gateway’s Discover lights feature.
Perform the following procedure to add lights via Zigbee auto-join method.
-
Go to the physical location of the group/zone where lights need to be added and make sure that the lights are energized.
-
Luminaires with wireless drivers, Smart T-LEDs, non-Interact luminaires connected to SR Bridges, switch relays or DALI extenders should be ON at full brightness.
-
Luminaires with built-in sensors should be ON at full brightness and each sensor’s LED indicator should turn from yellow to red when it detects motion, and from red to yellow after motion is no longer detected.
-
Luminaires with DALI drivers connected to a mains powered sensor with a DALI interface (MPS-DALI) sensor should be ON at full brightness. Each MPS-DALI sensor’s LED indicator should turn from yellow to red when it detects motion, and from red to yellow after motion is no longer detected.
-
-
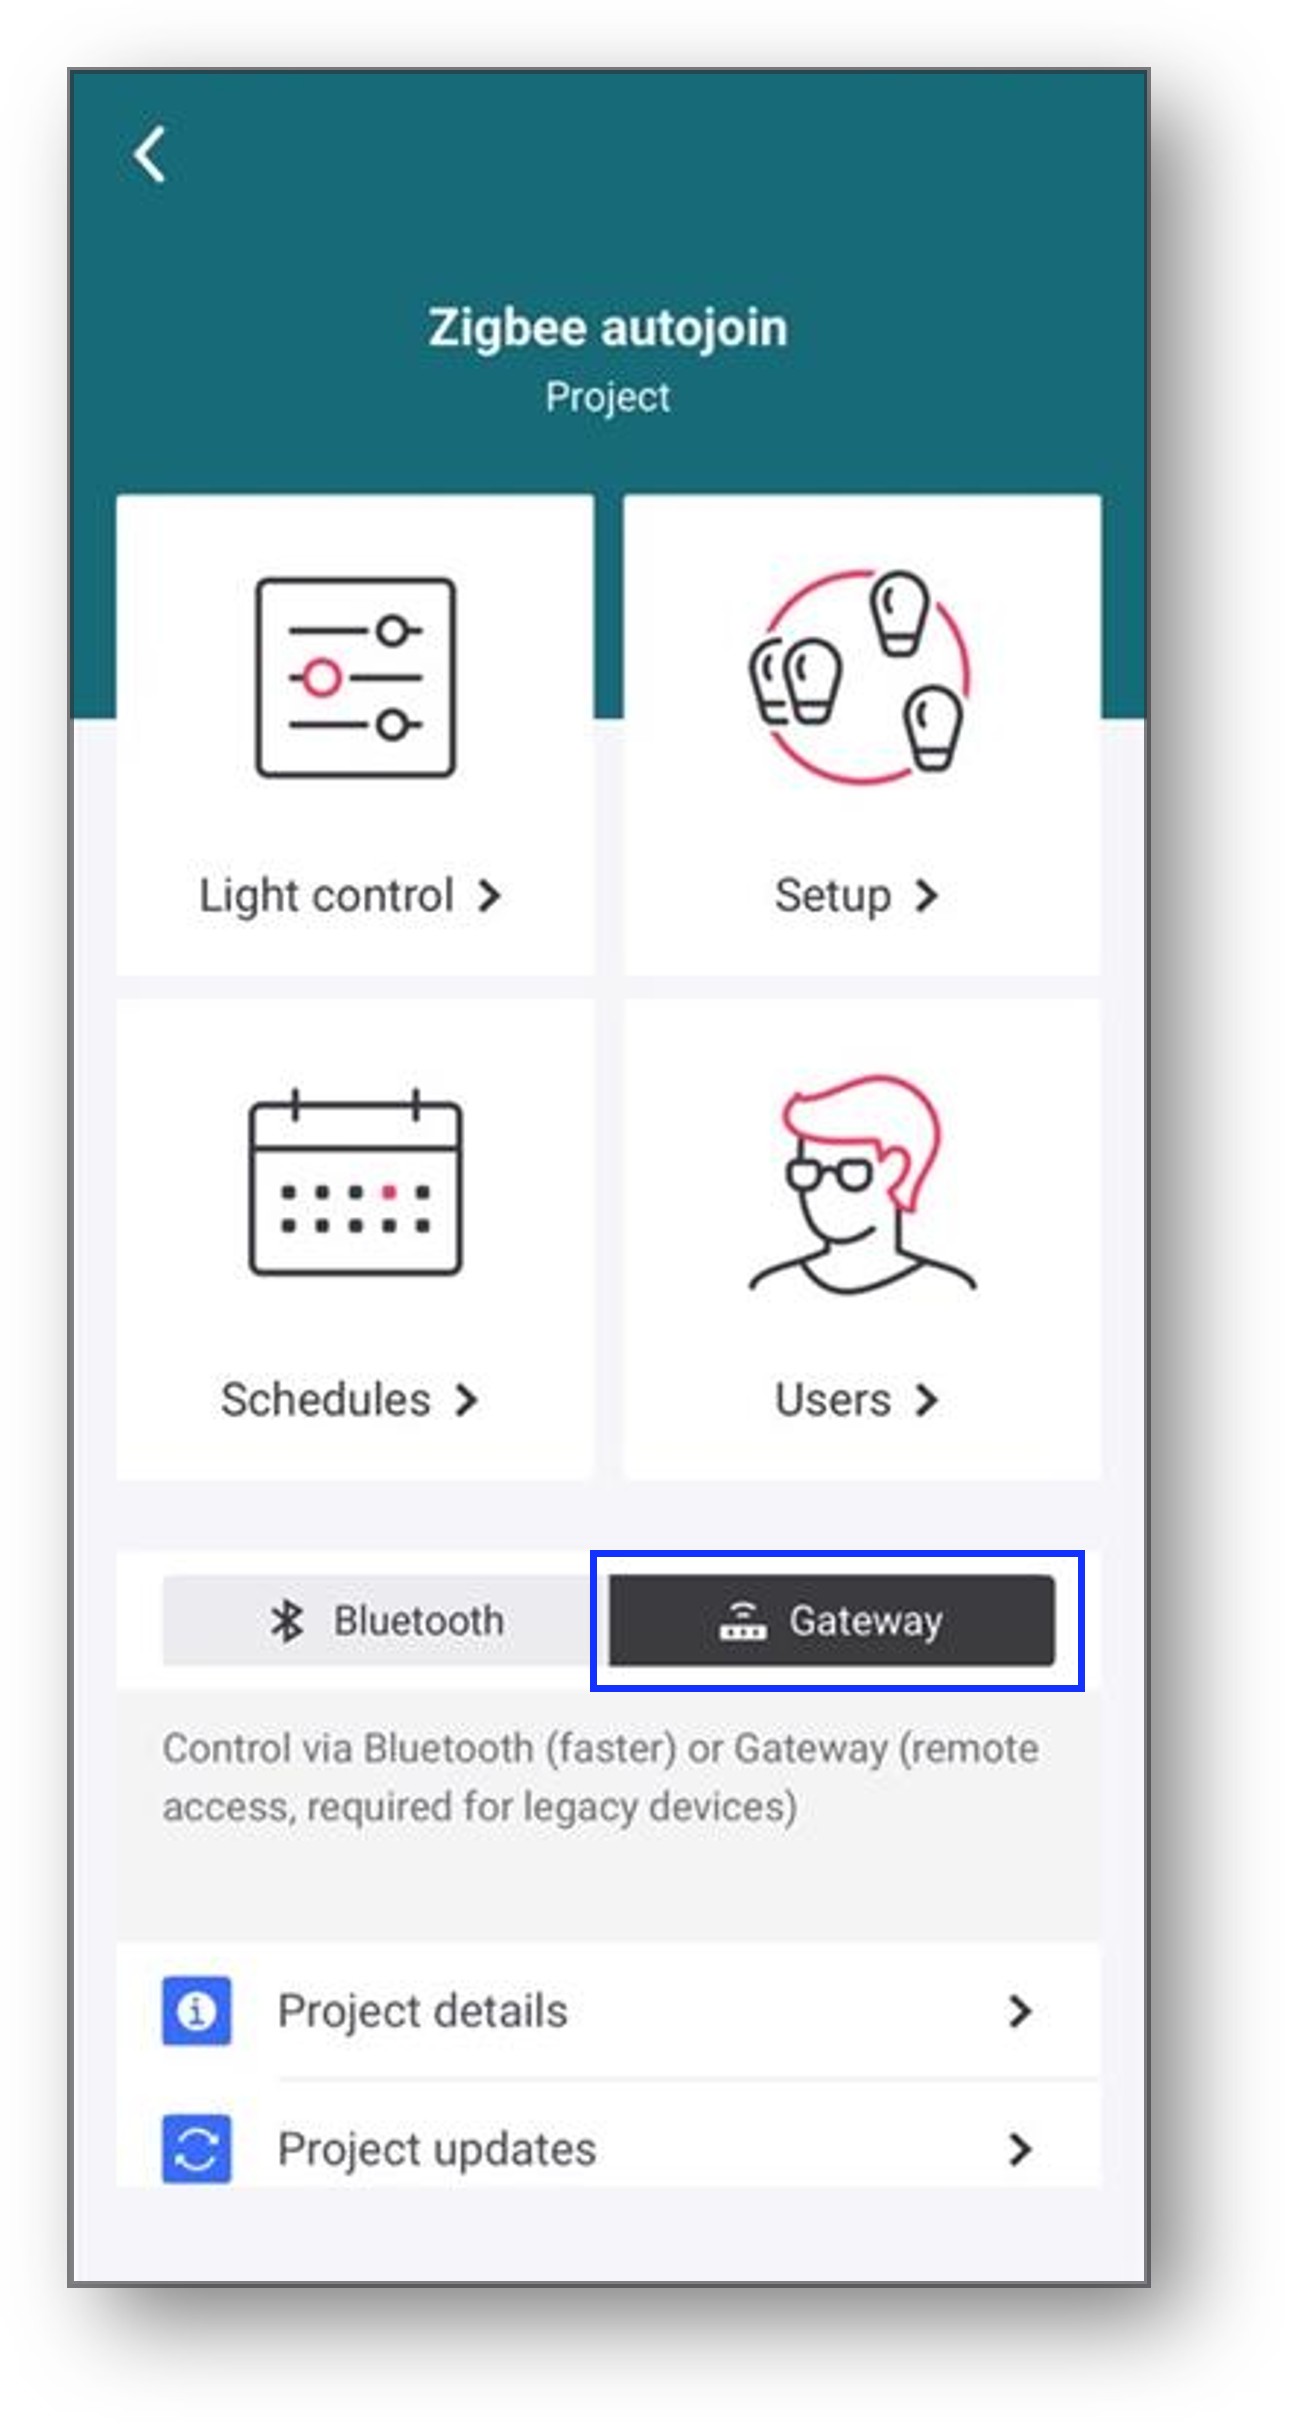
Open and log in to the mobile app. Navigate to the appropriate project and select the Gateway mode in the Project screen.
-
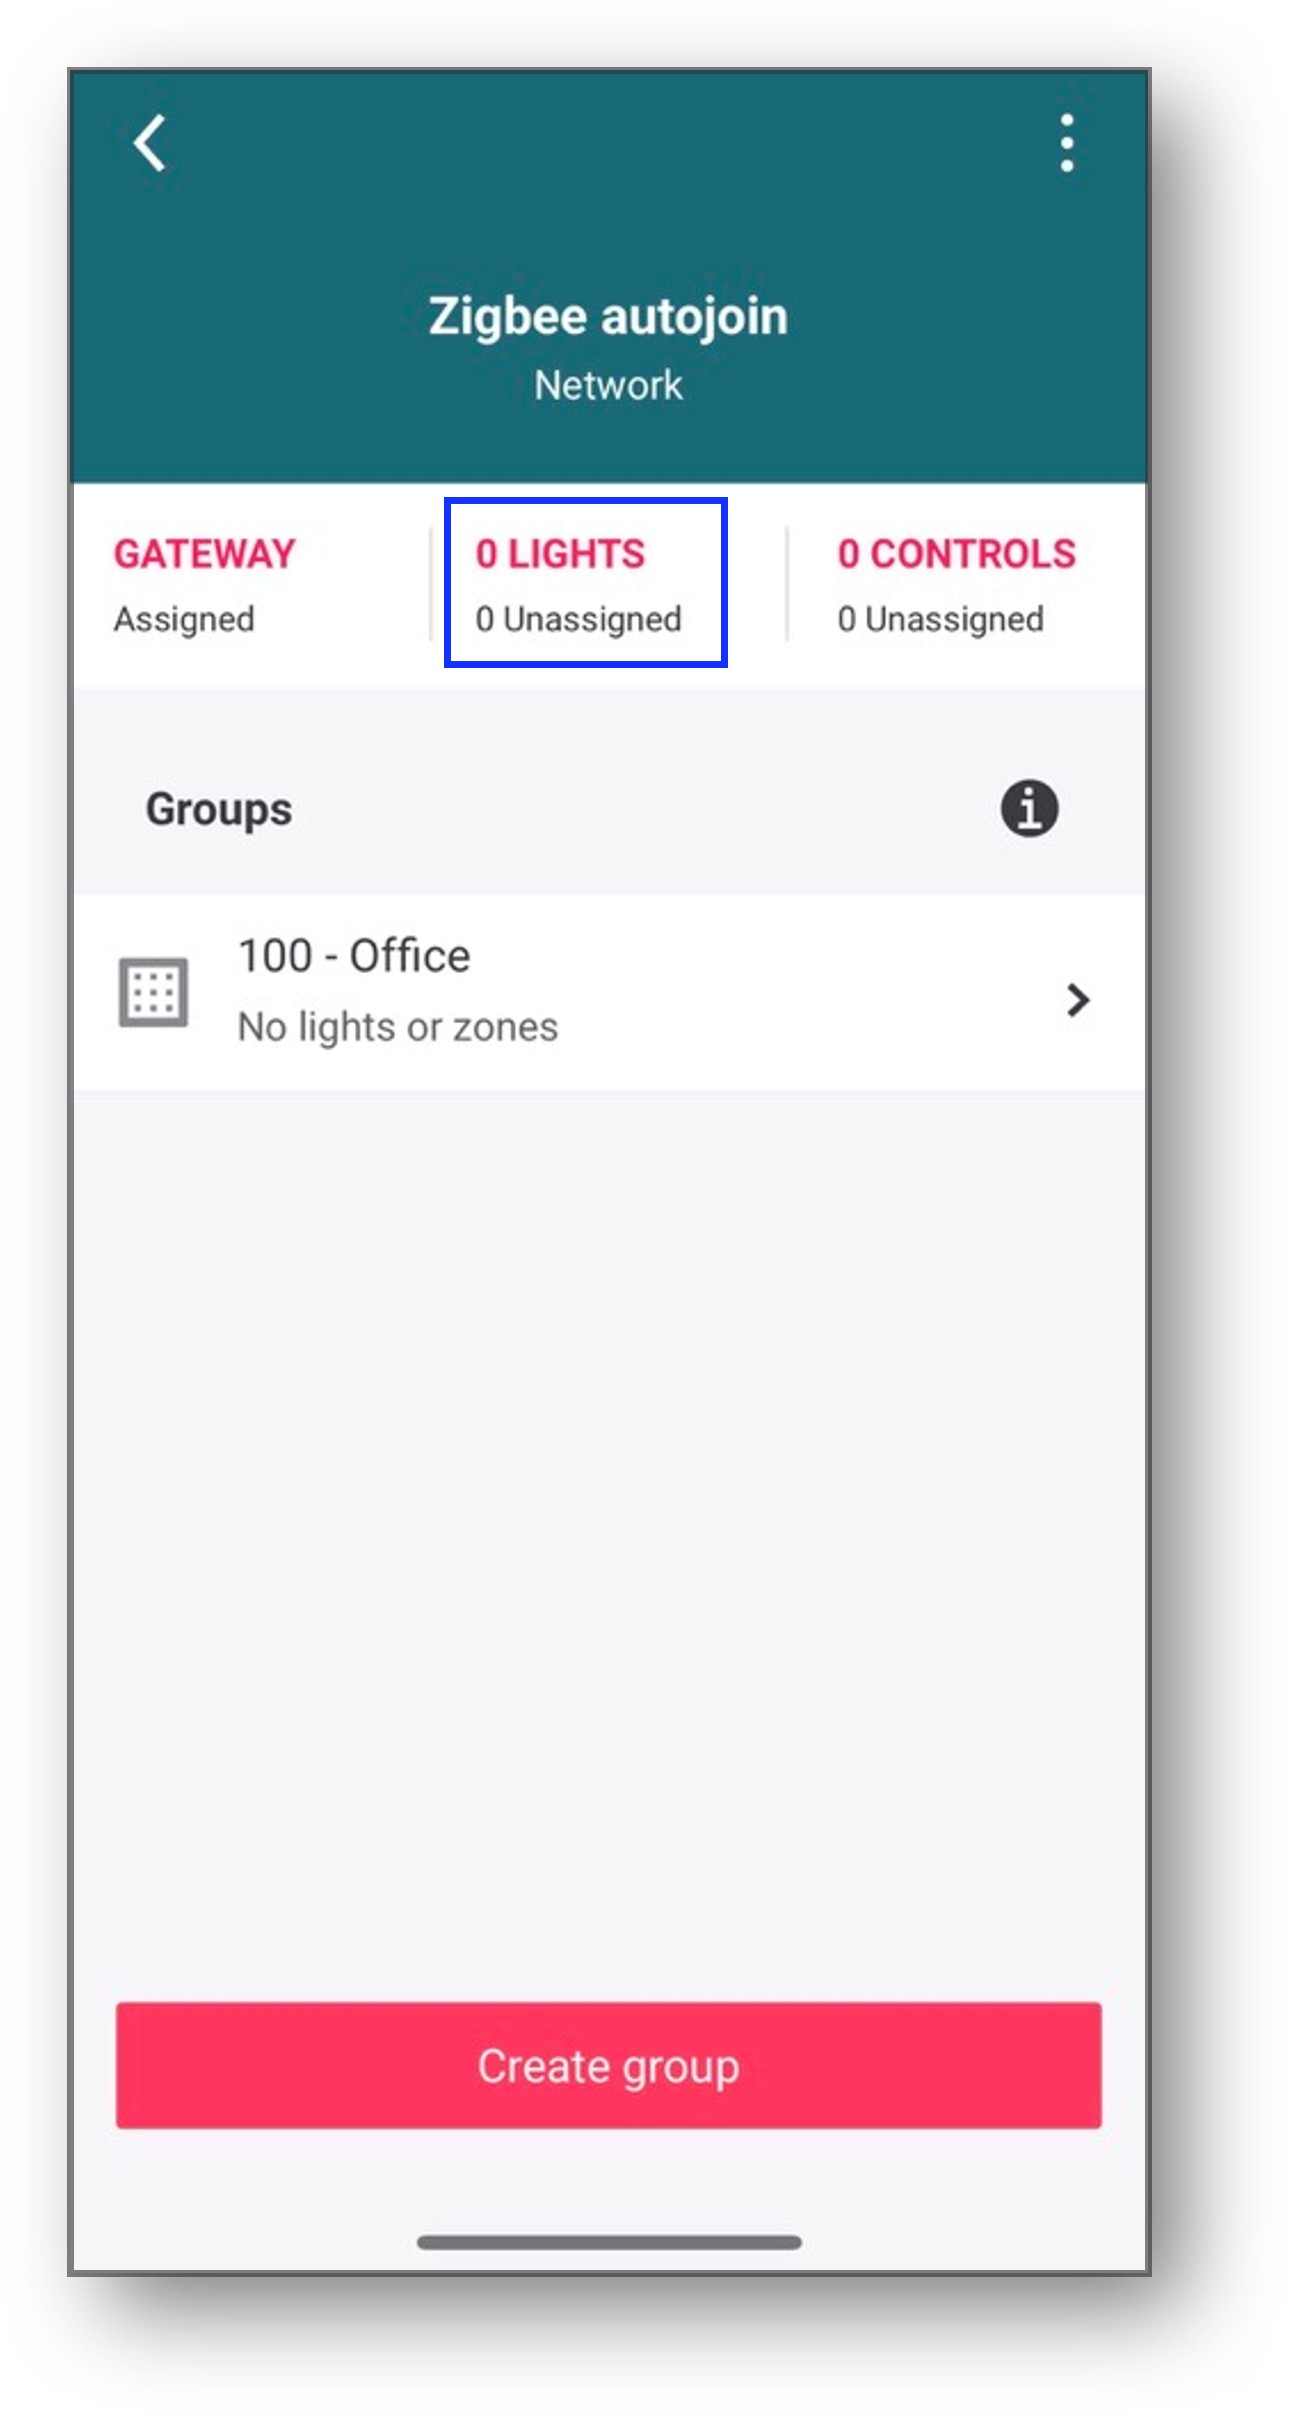
Navigate to the project Setup screen and select the appropriate wireless network. In the Network screen, tap LIGHTS.
-
By default, the app will run a BLE scan to find lights that support BLE in the range of the mobile phone.
Gen 1 devices have a BLE radio in them, but they are not configured to add them using the BLE scan process. During the BLE scan process, you will discover and can blink these devices, but if you try to add them via the BLE scan list, it will not work and an error Unable to assign light appears.
If you performed this method, you have to power cycle the light or else you will not be able to program it after it was added via the discovery lights method. -
Once the BLE scan completes, tap Discover lights.
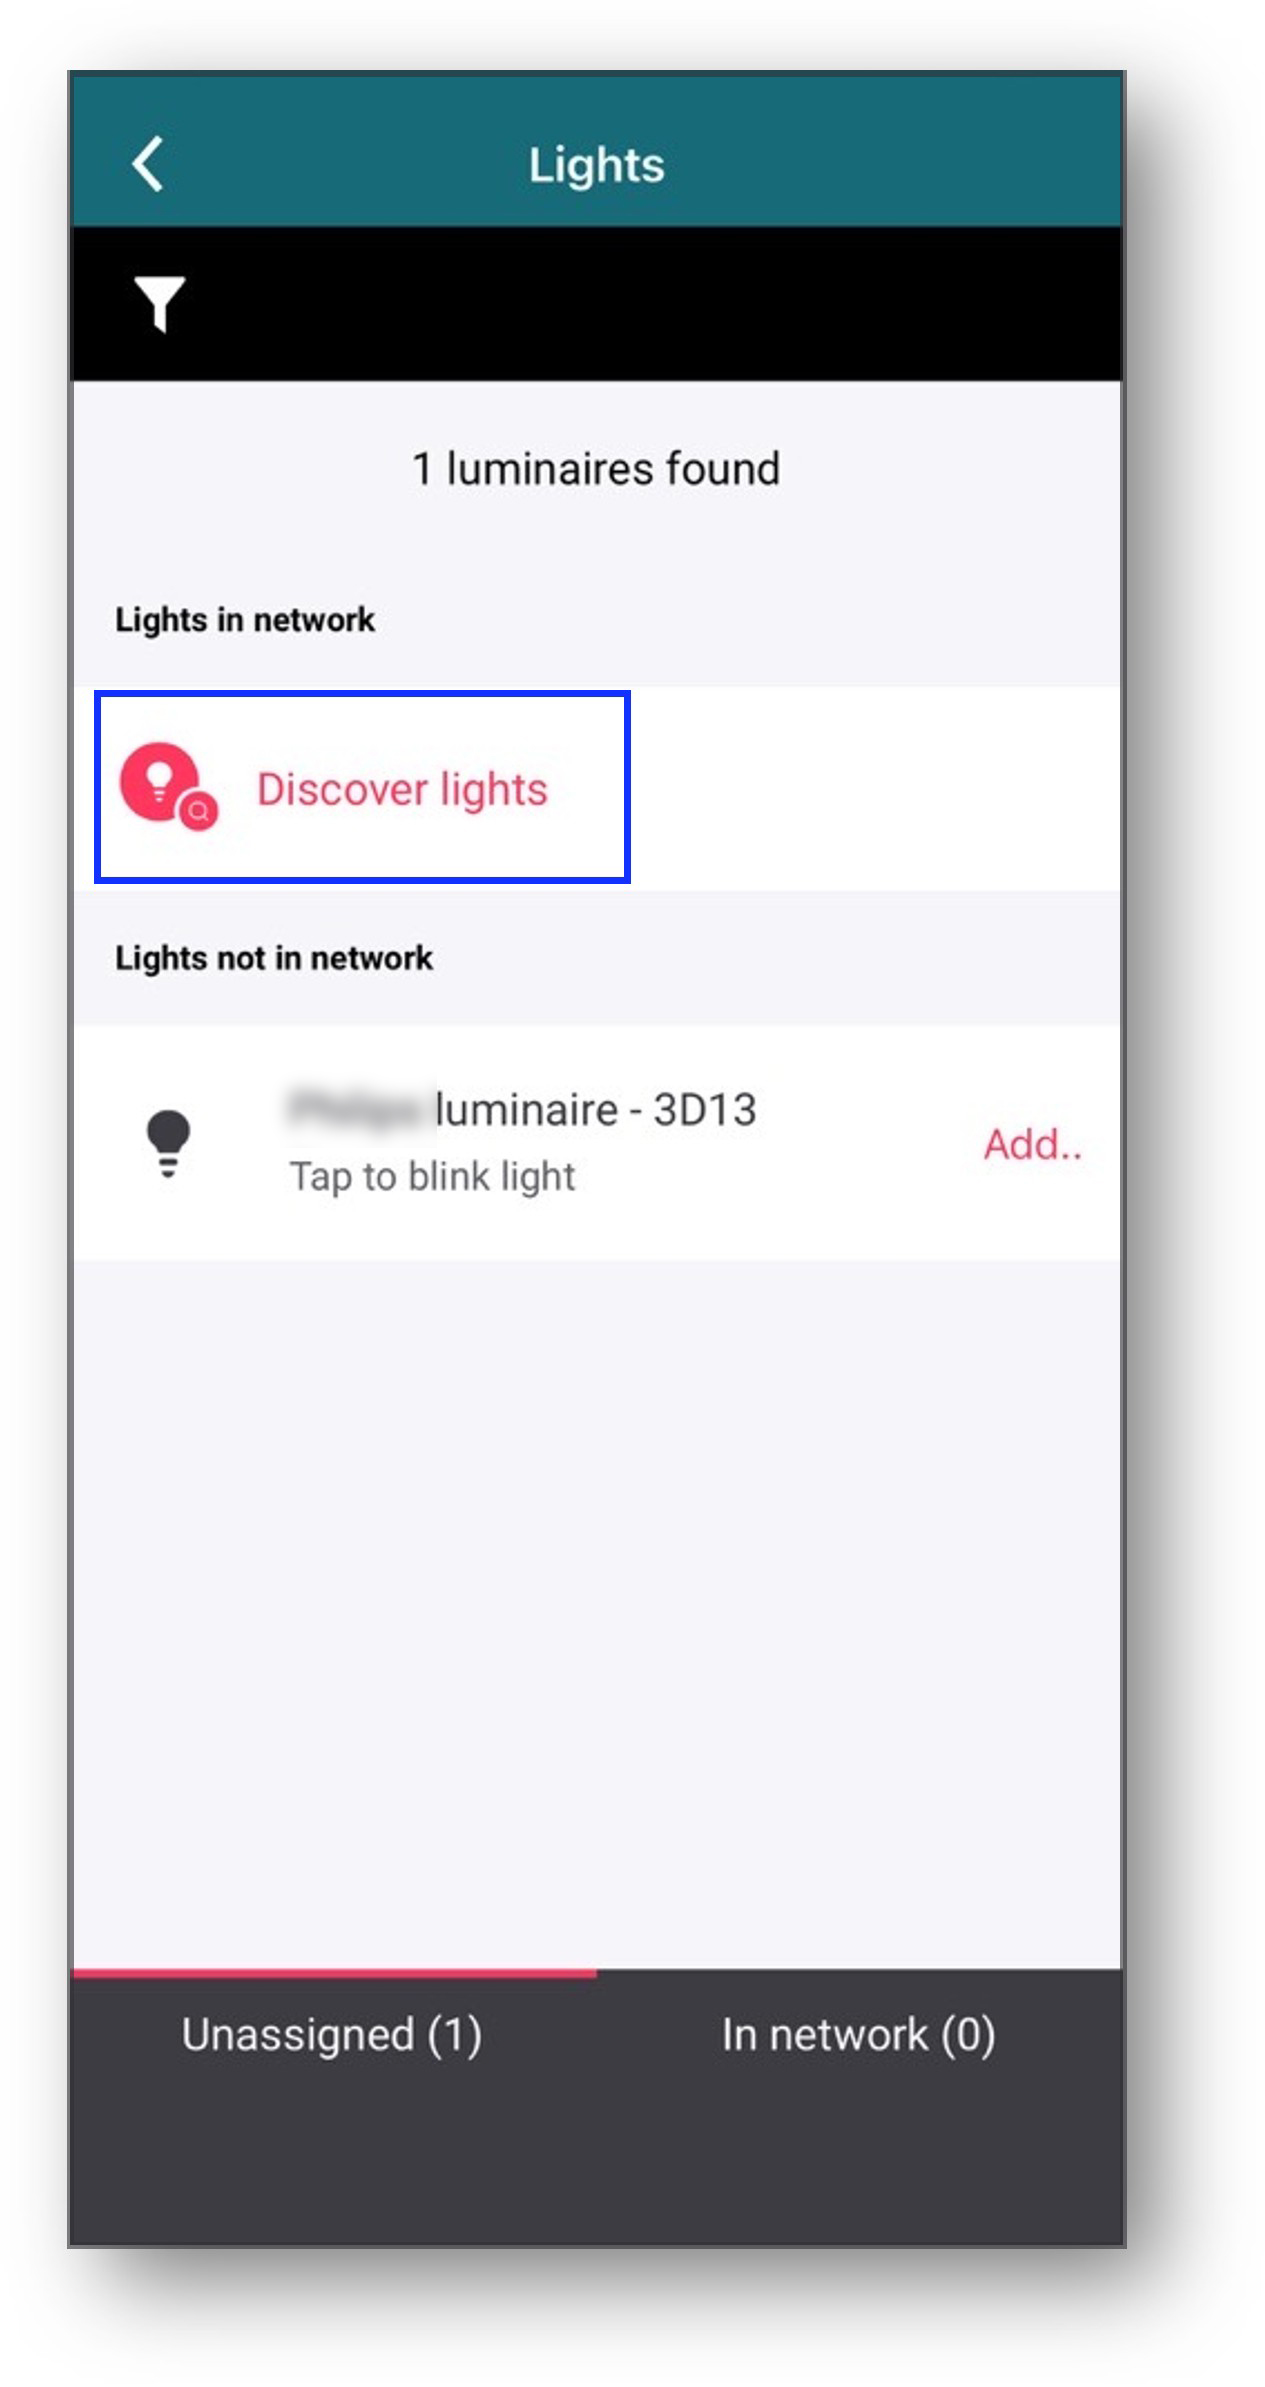
-
In the Discover lights screen, read the information and then, tap Start discovering.
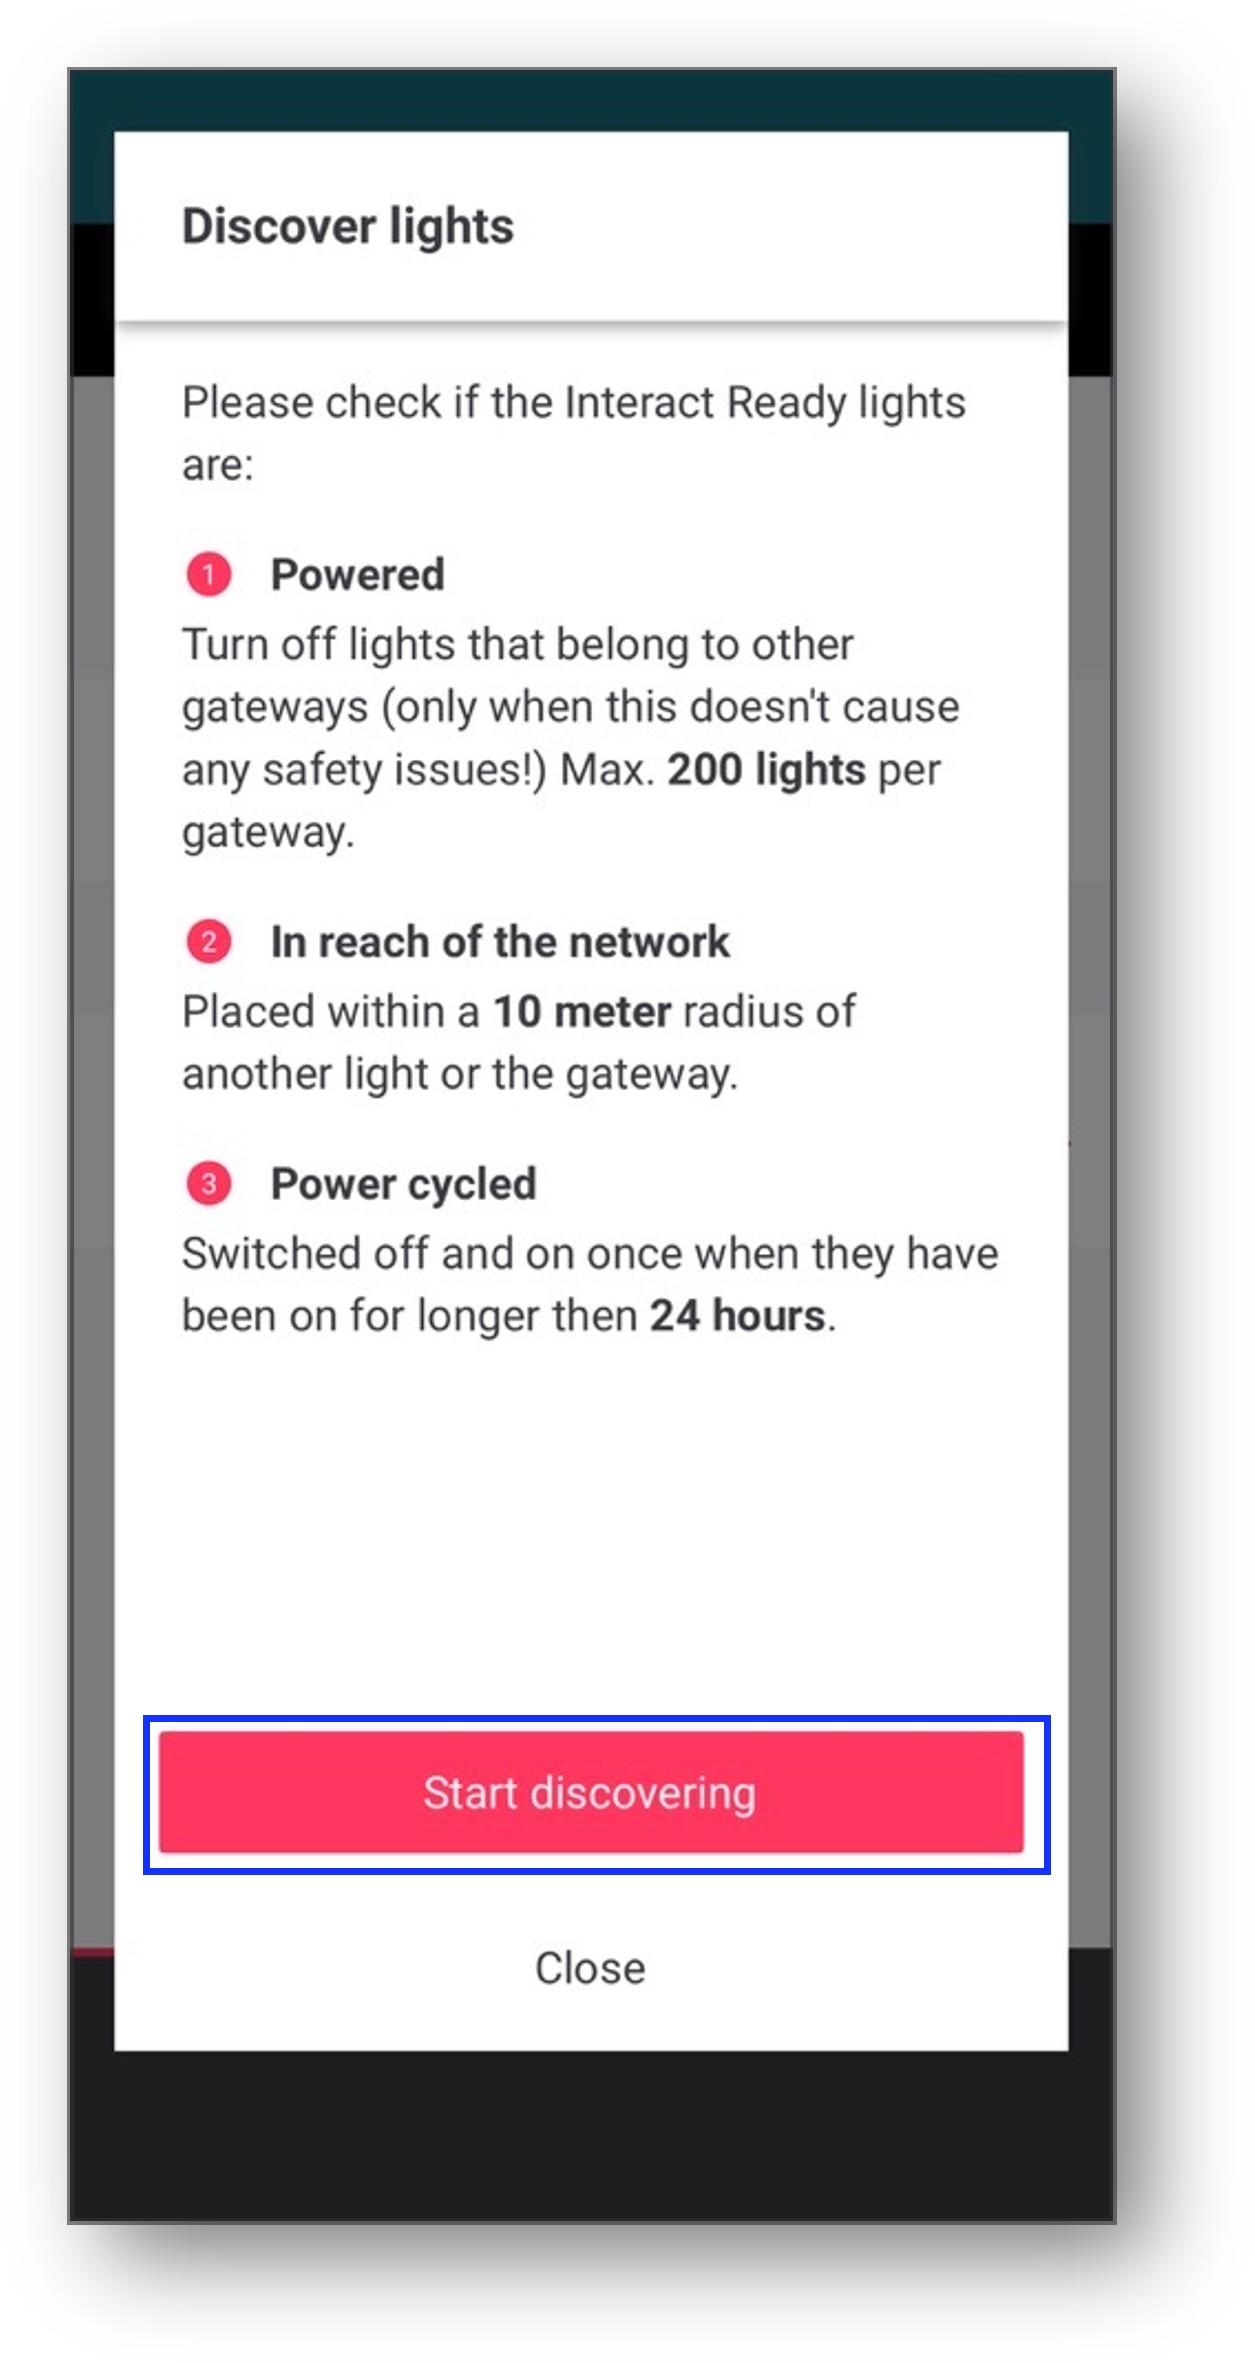
Result: The gateway will open its Zigbee network to allow auto-join devices to join the network.
-
During the discovery process, if the gateway discovers the expected number of devices before the timer elapses, you can tap Stop discovering to proceed with light assignment.
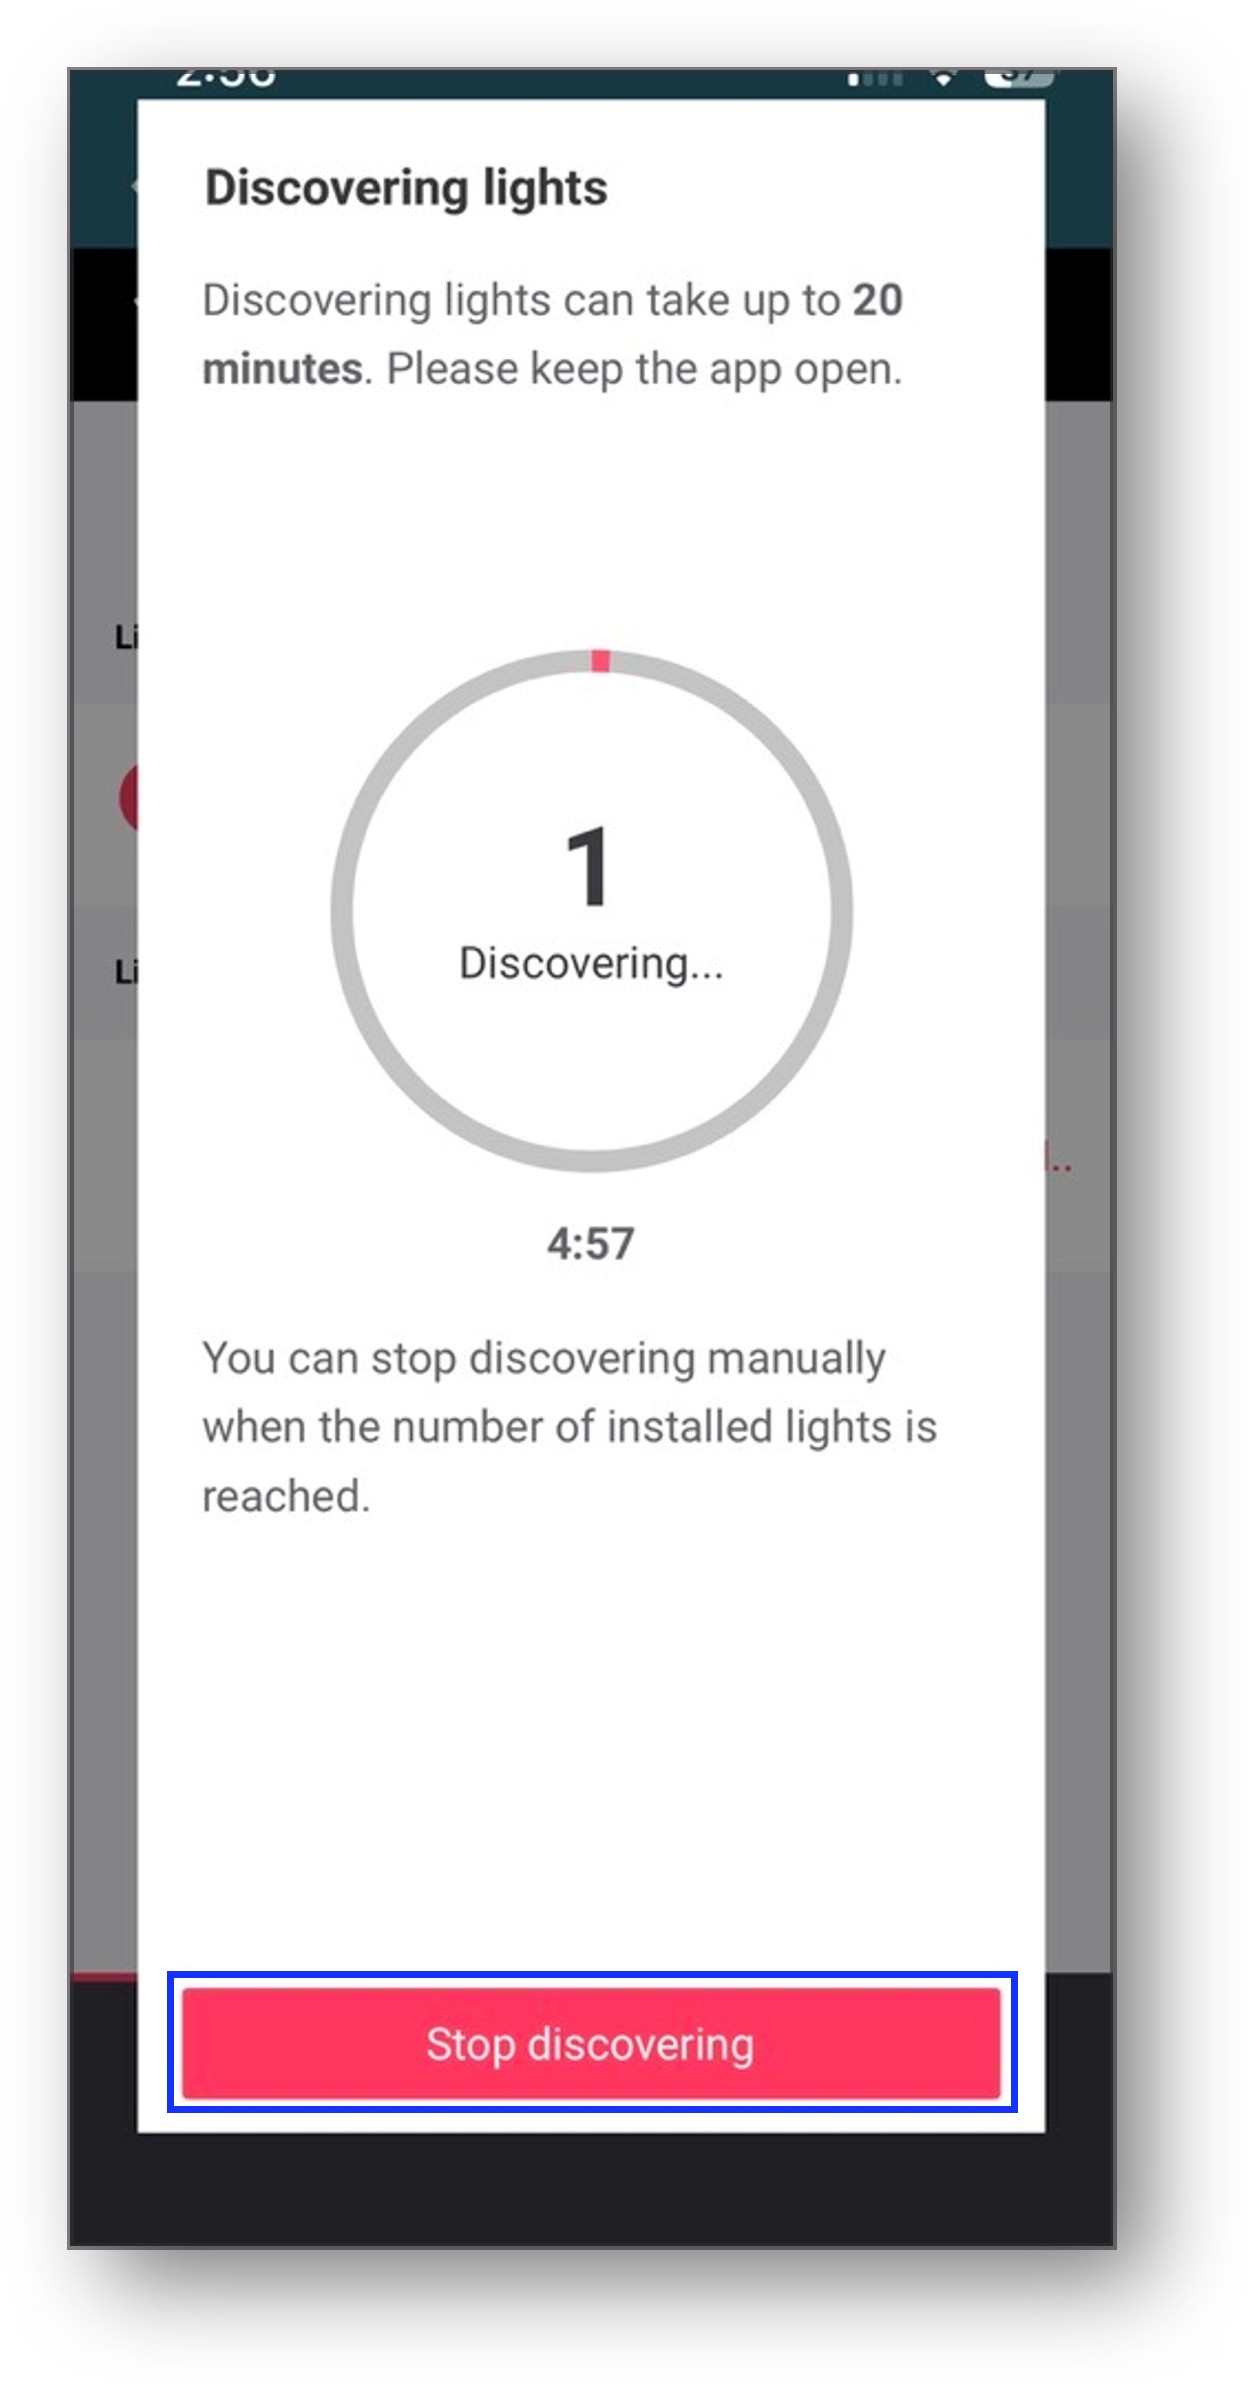
-
The gateway will start to fetch the discovered light data. Once completed, tap Assign lights.
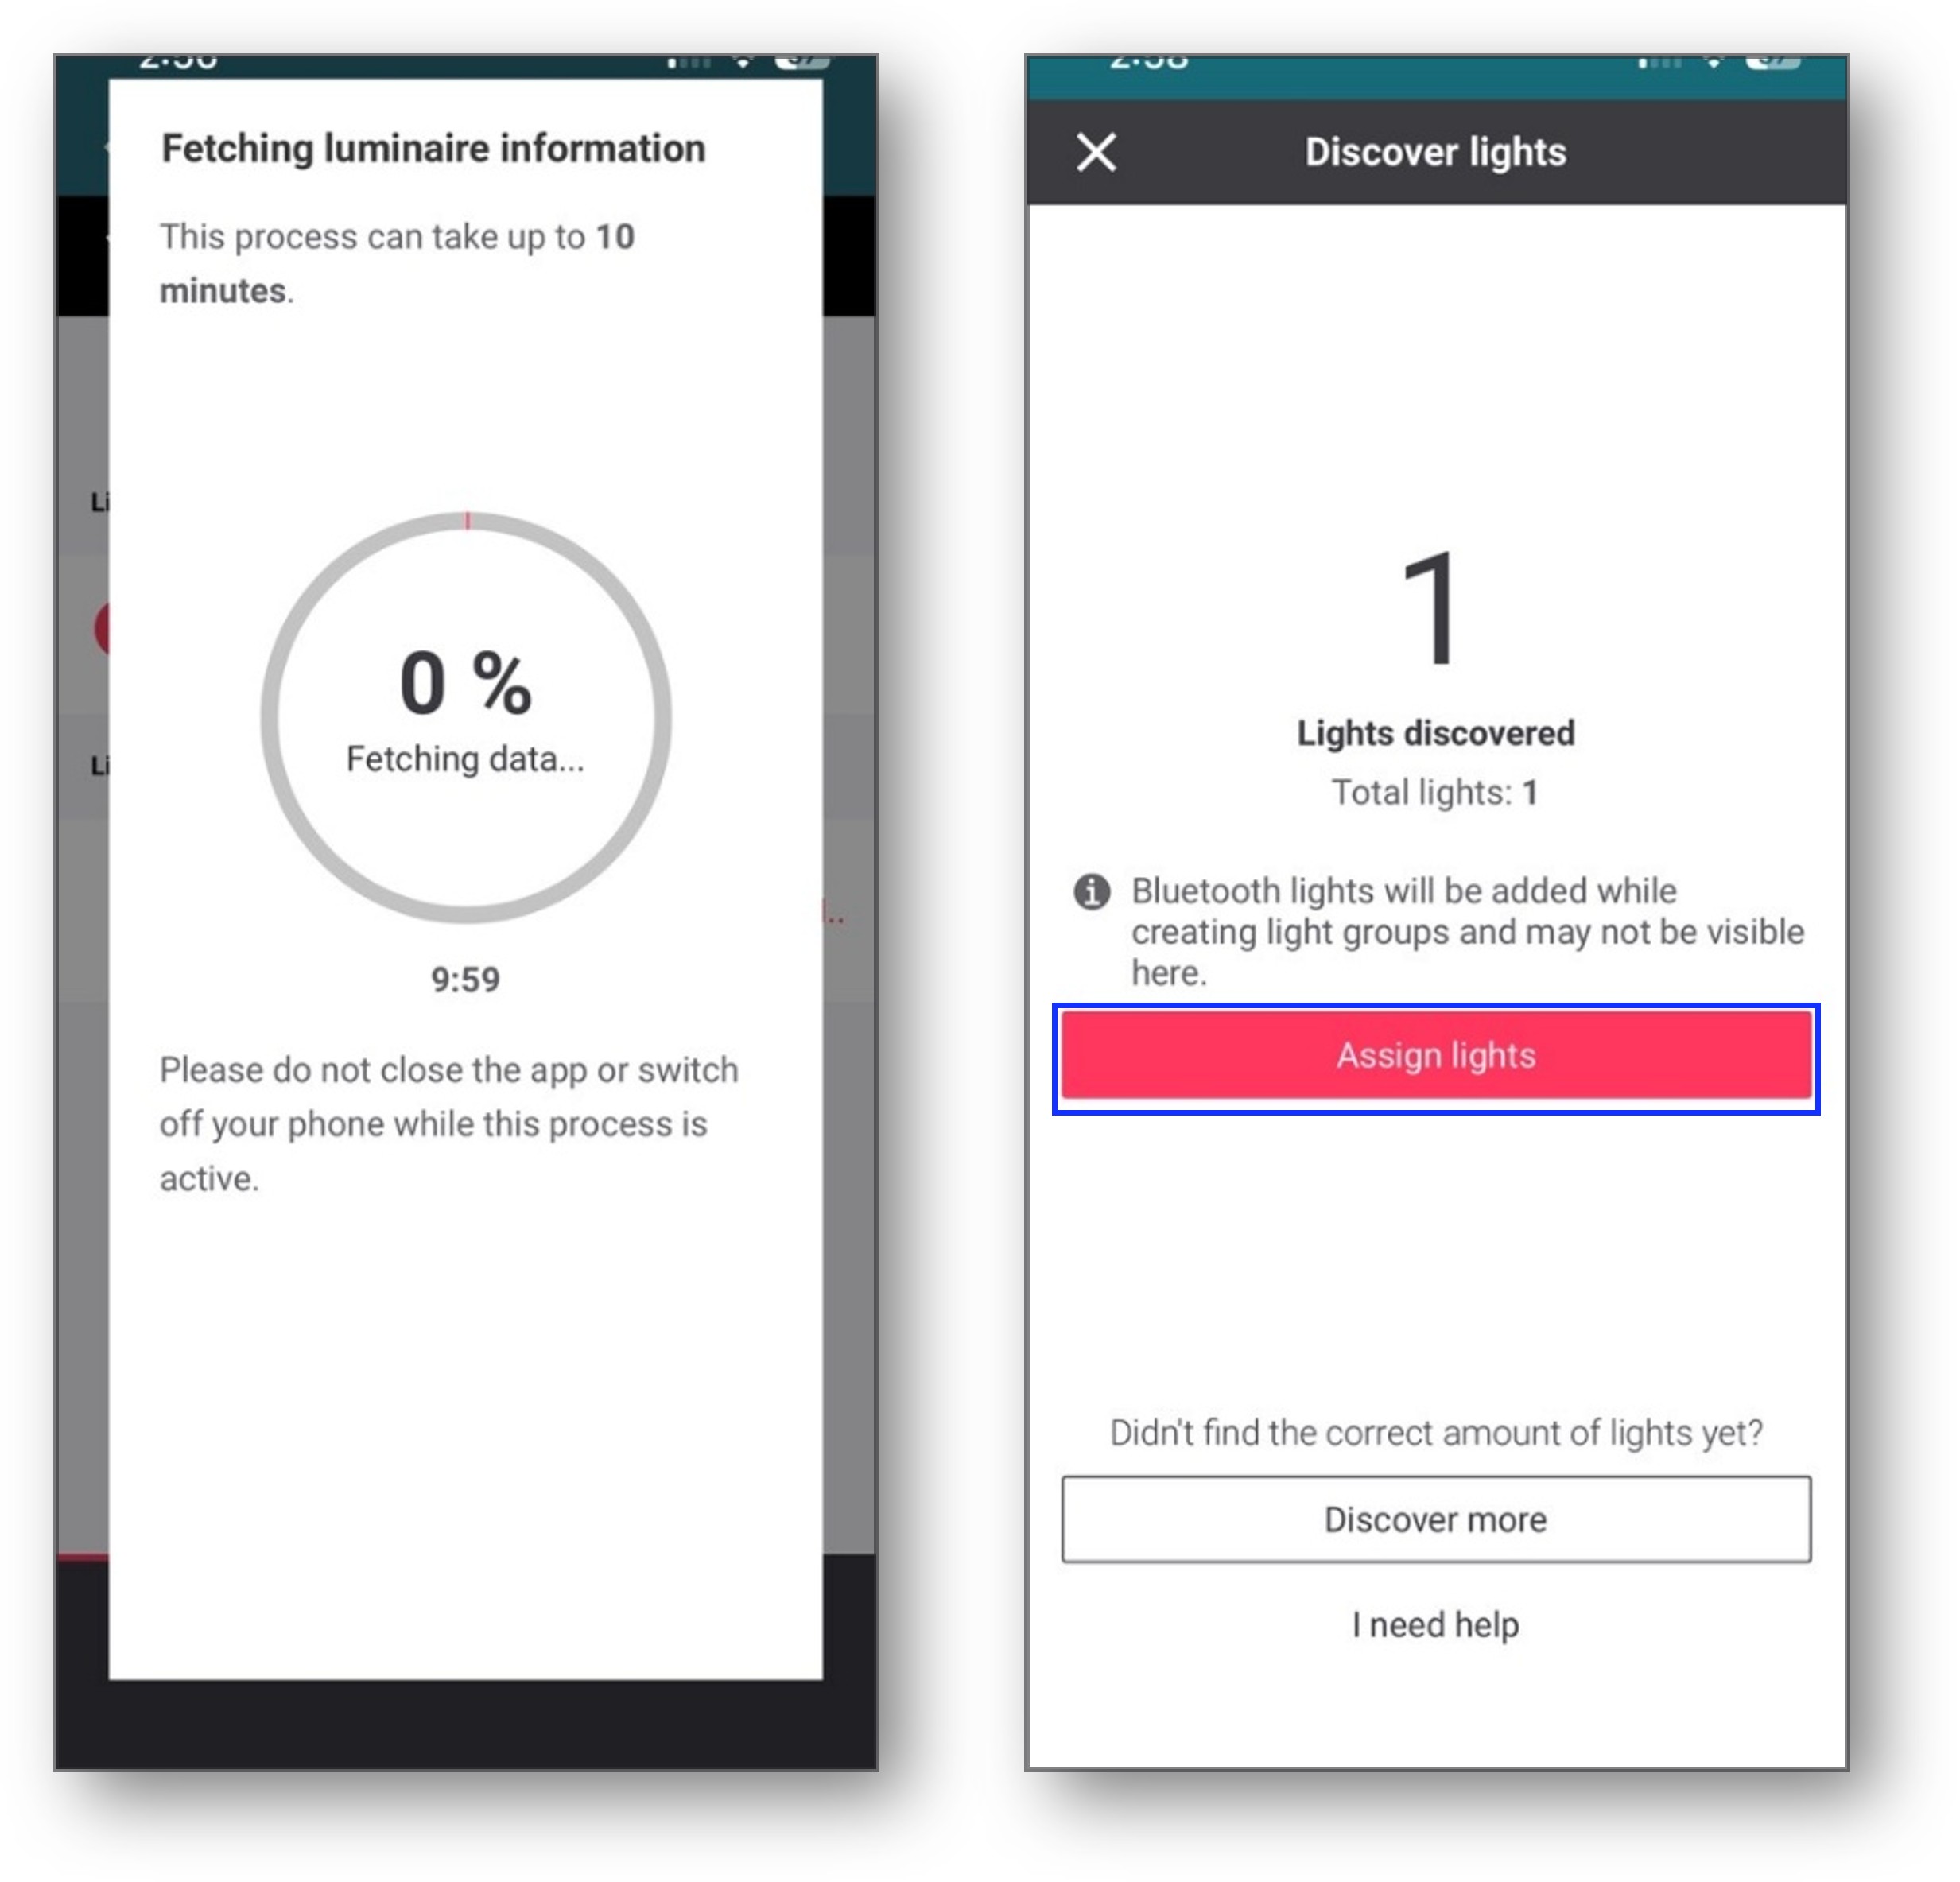
Result: The list displays lights found by the gateway which will have a number, instead of a 4-symbol code.
-
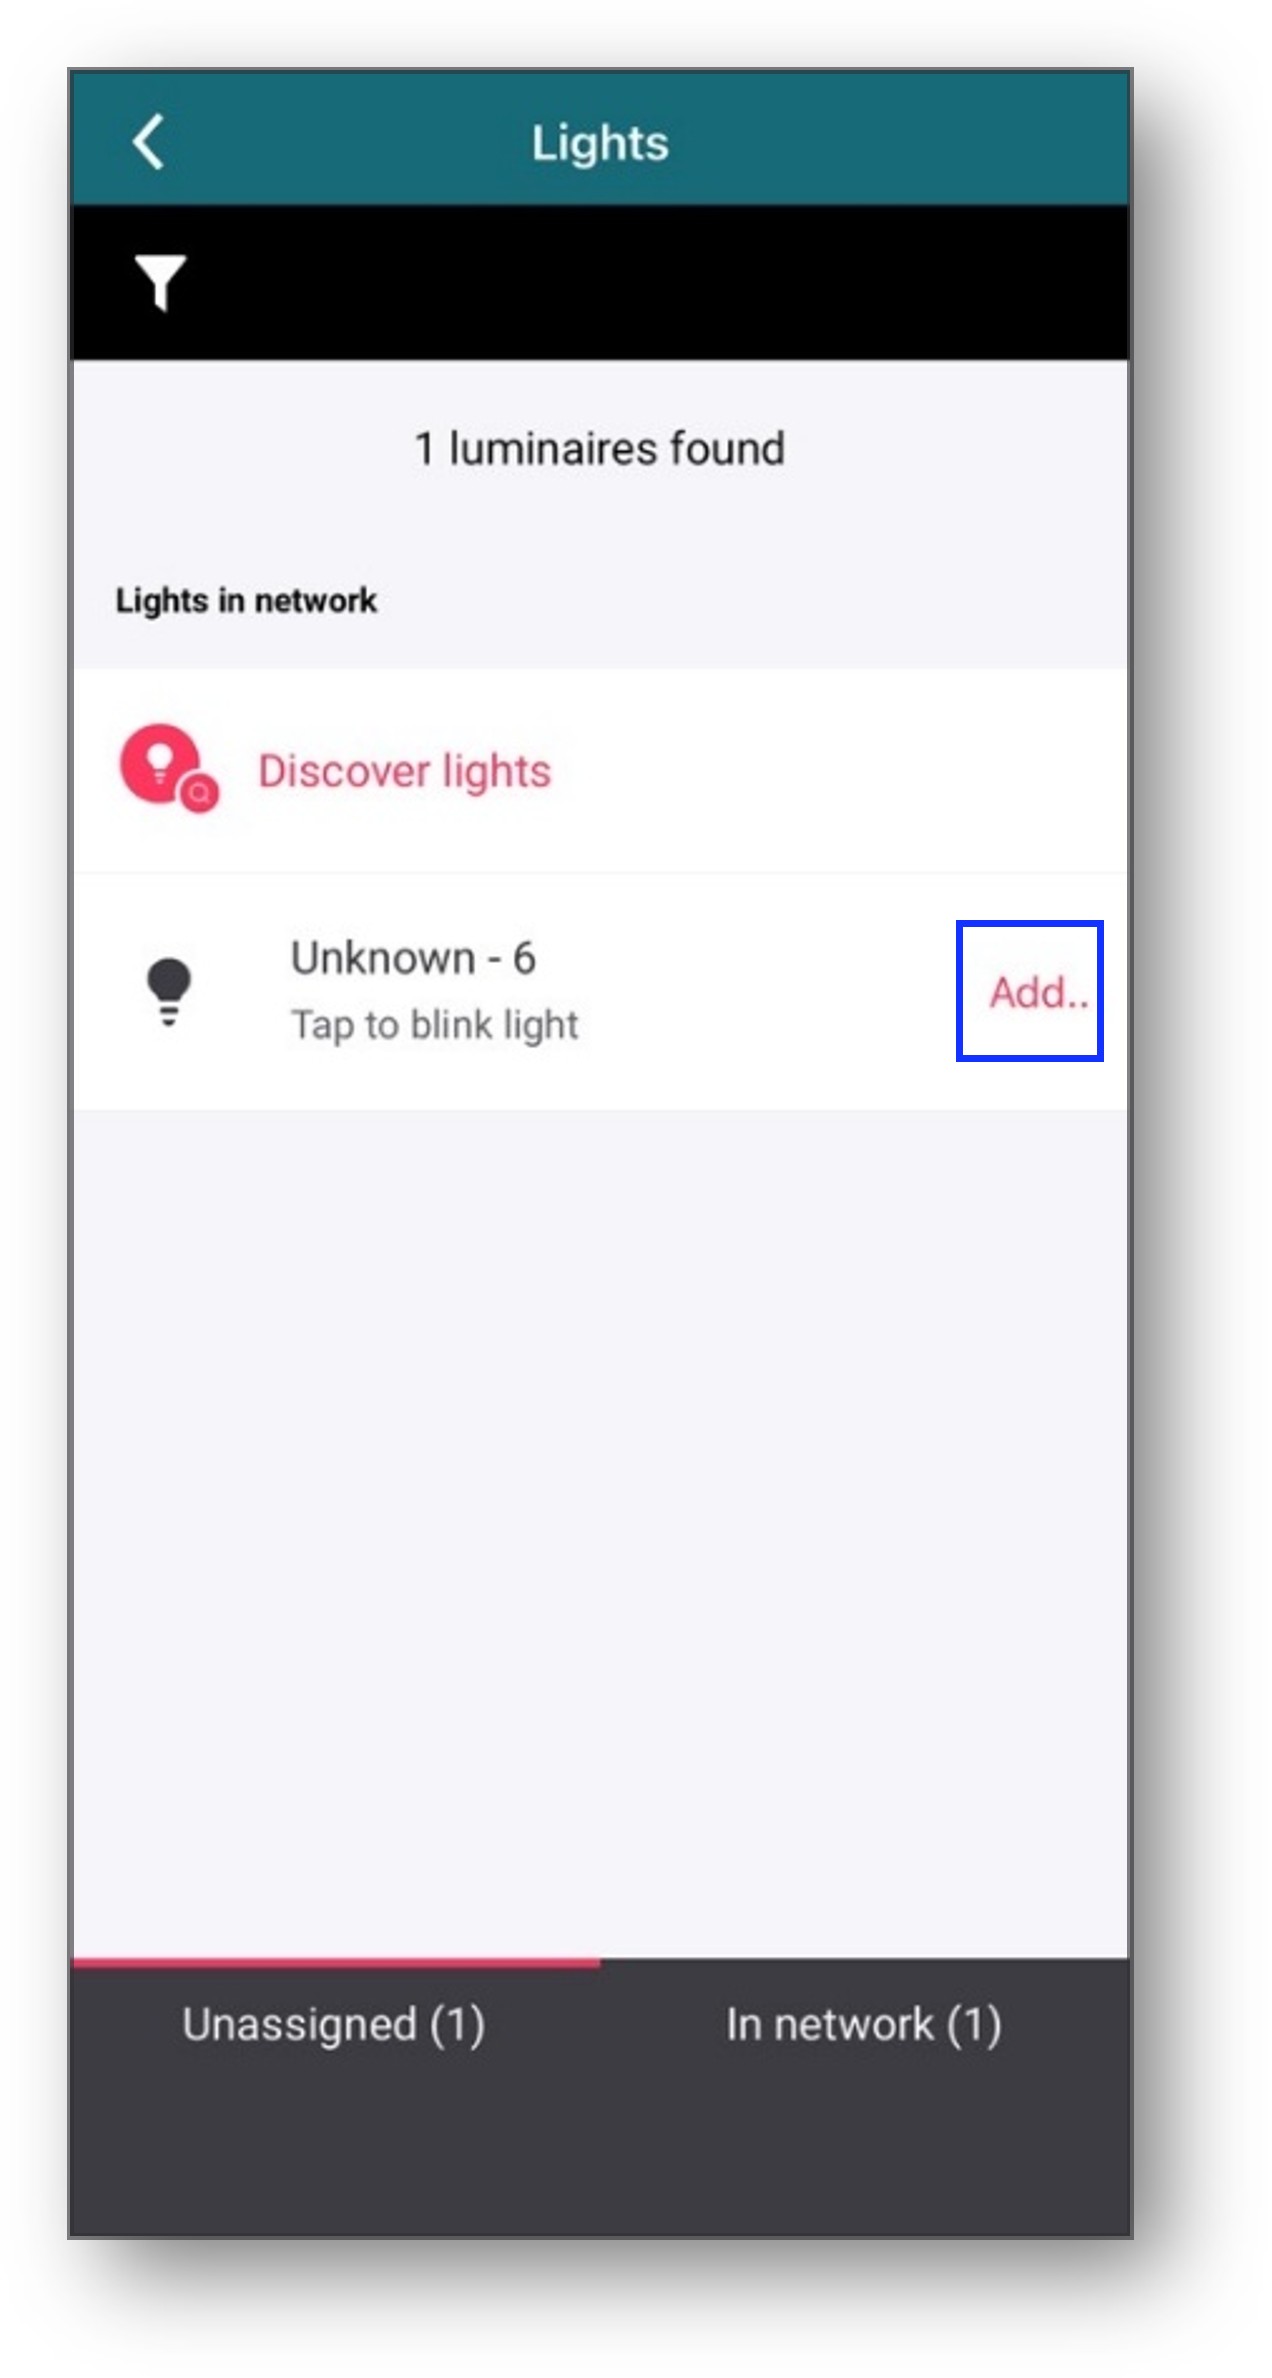
To identify a light physically, tap a light in the list and the respective light will blink. Once the light is identified to assign to a group, tap Add..
-
Select the group you would like to add the light or you can create a new group, and tap Assign.
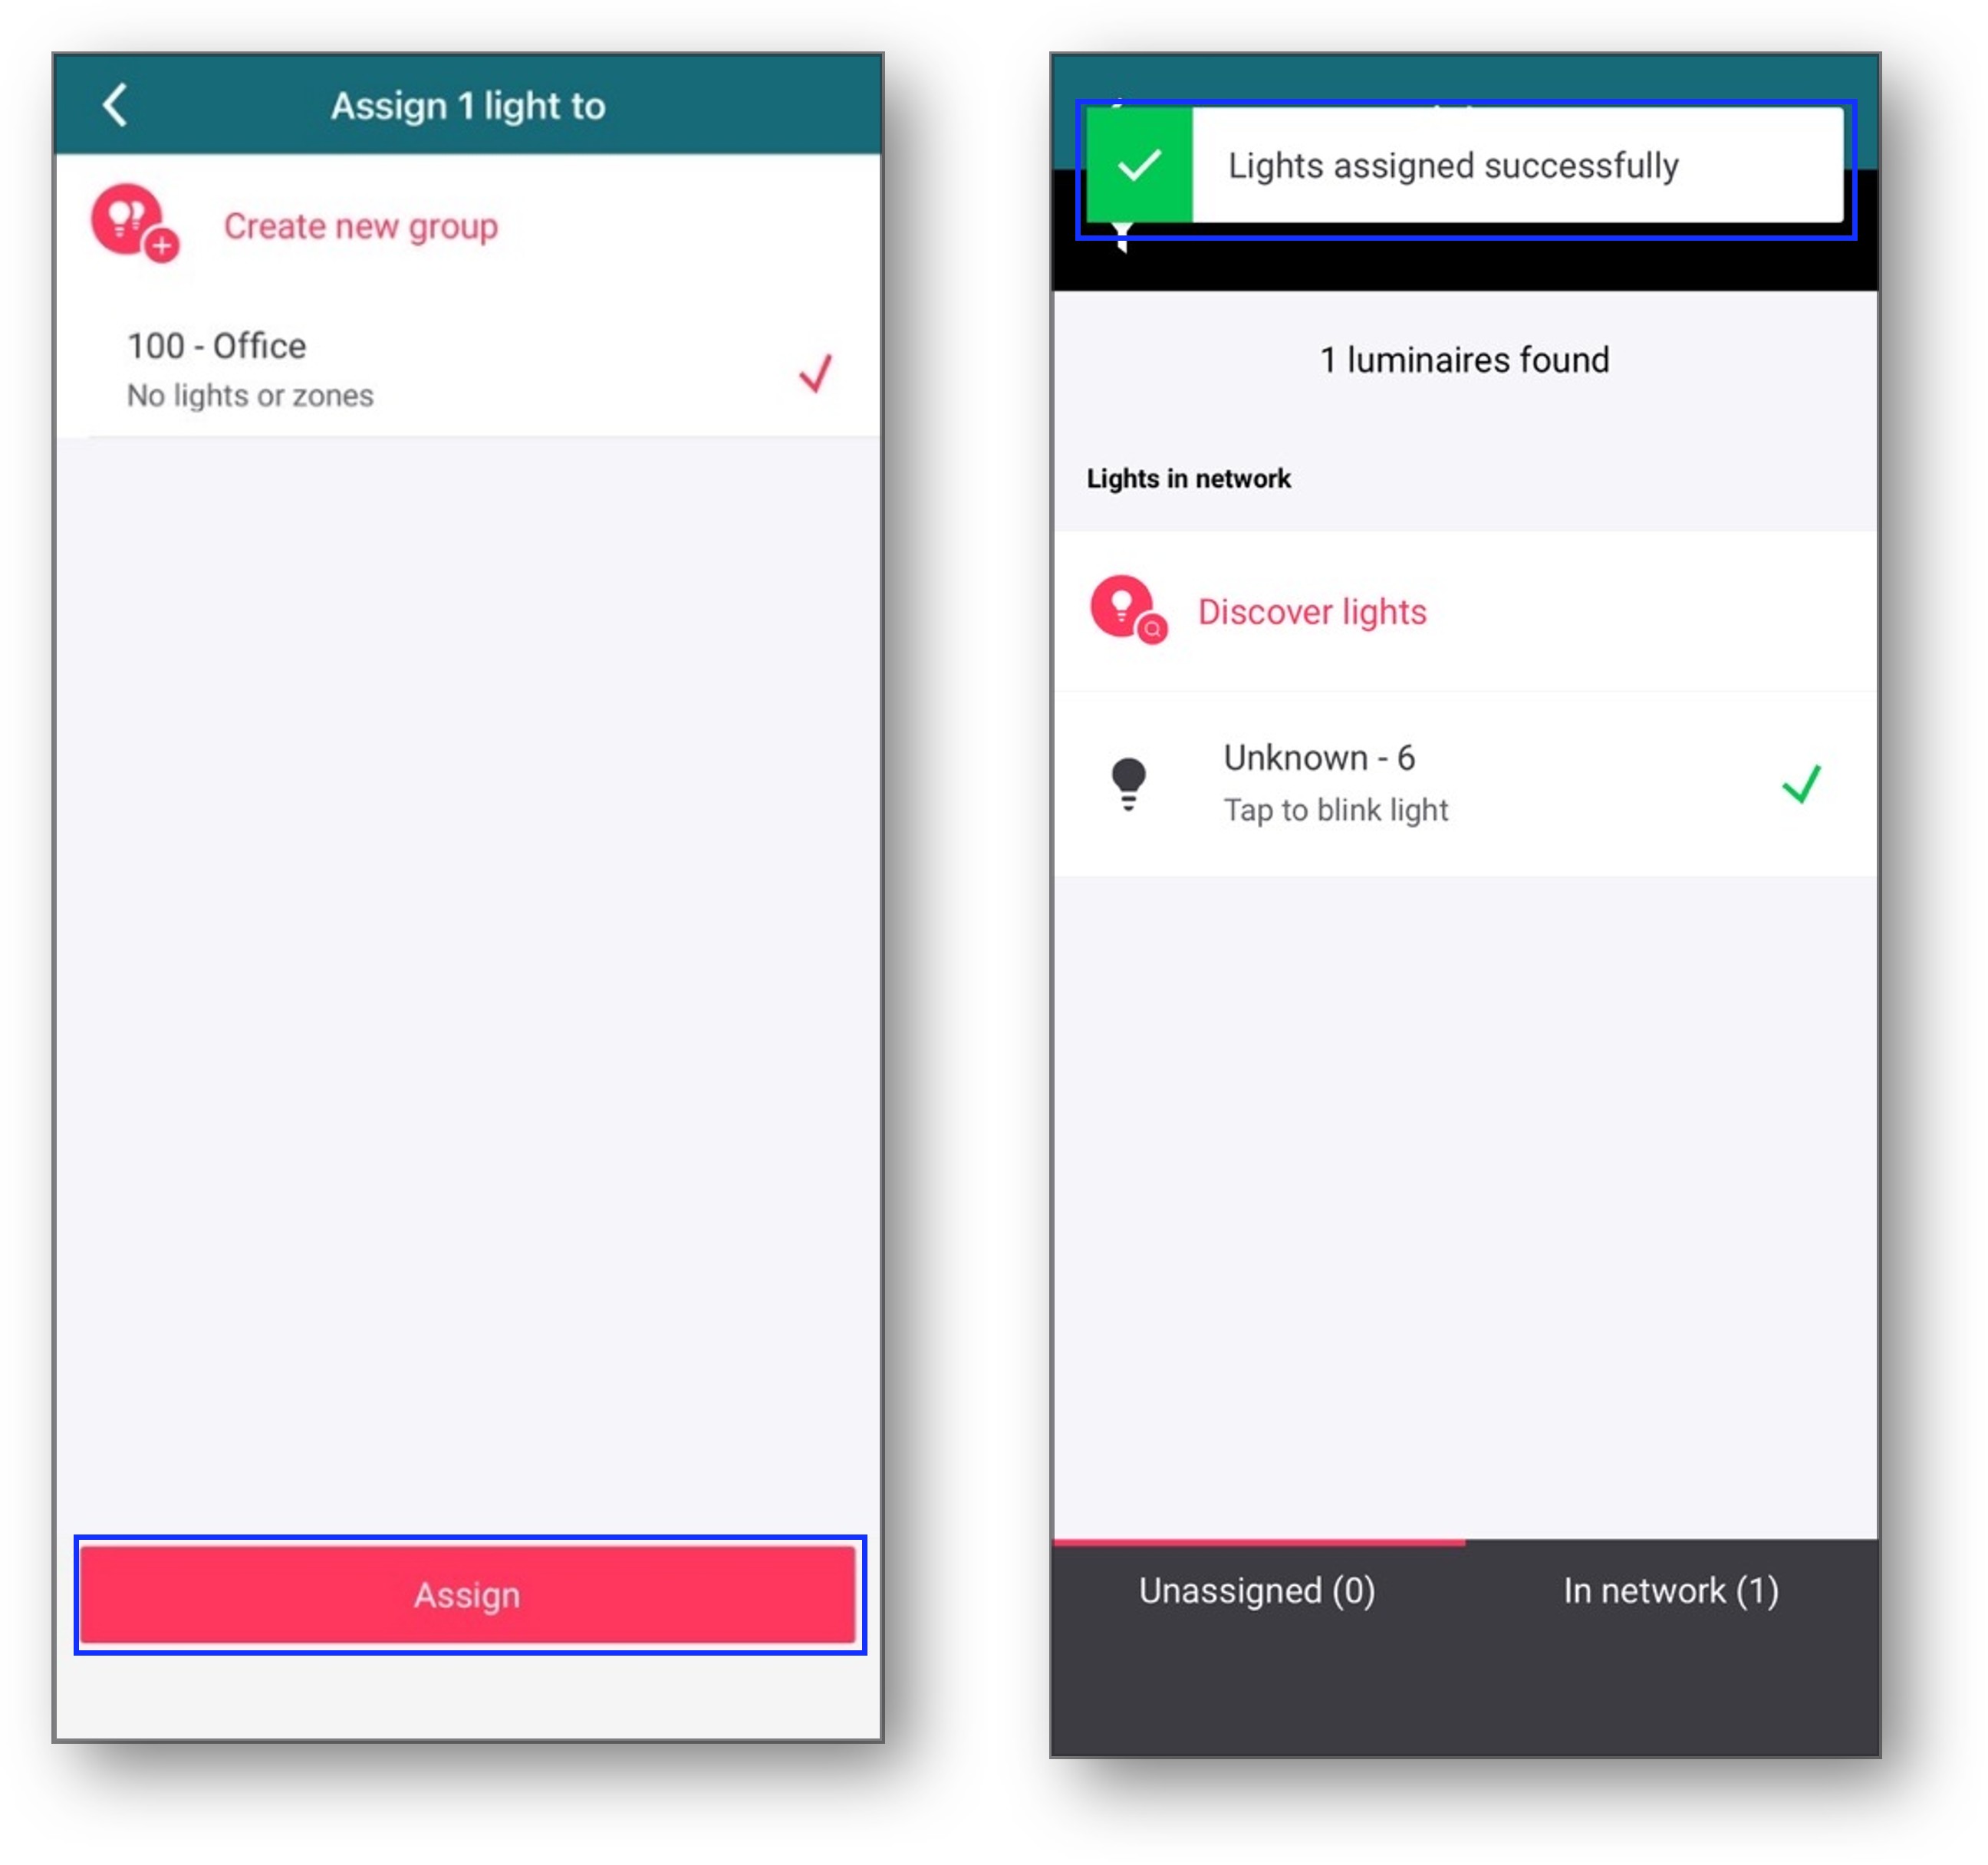
Result: The message Lights assigned successfully will appear.
-
Repeat the steps 9 and 10 to assign other lights appeared in the list to a group.
-
Once the light assignment is completed, navigate back to the Network screen.