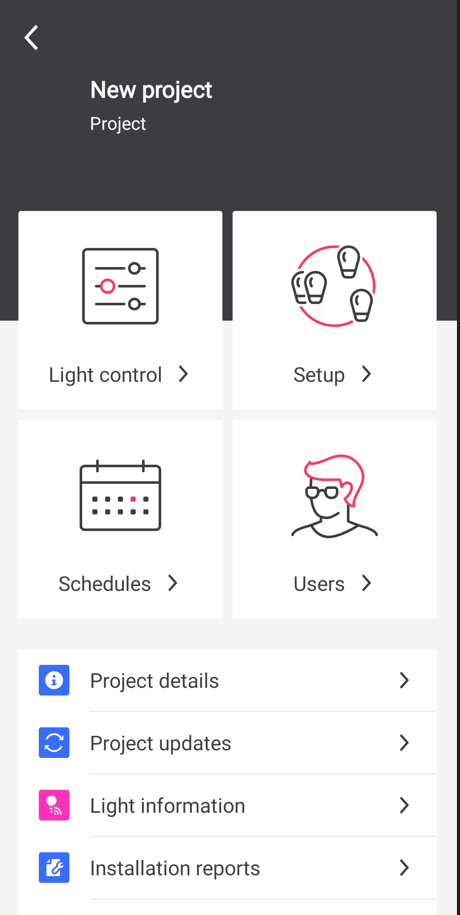
Schedules
Experts can use schedules to configure certain days of the week and times of the day to command one or more groups to:
-
Turn on (task level)
-
Turn off
-
Go to a scene
Schedules act as a manual override, just like using a wall switch to turn the group on, off or call a scene at a certain time of day. This means that after a schedule is called, automatic behavior in groups with Auto Off behavior templates will resume once the Hold time elapses (i.e. the group remains vacant). Additionally, schedule actions can be overridden using wall switches where they exist.
| The maximum number of schedules for a project is 16. Each schedule can be configured with actions to control up to 16 different groups simultaneously. |
| Schedules operate on fixed days of the week (every week) and at a fixed time of day. Astronomical scheduling relative to sunrise and sunset and specific dates or date ranges are not supported. |
Schedules using the web portal
-
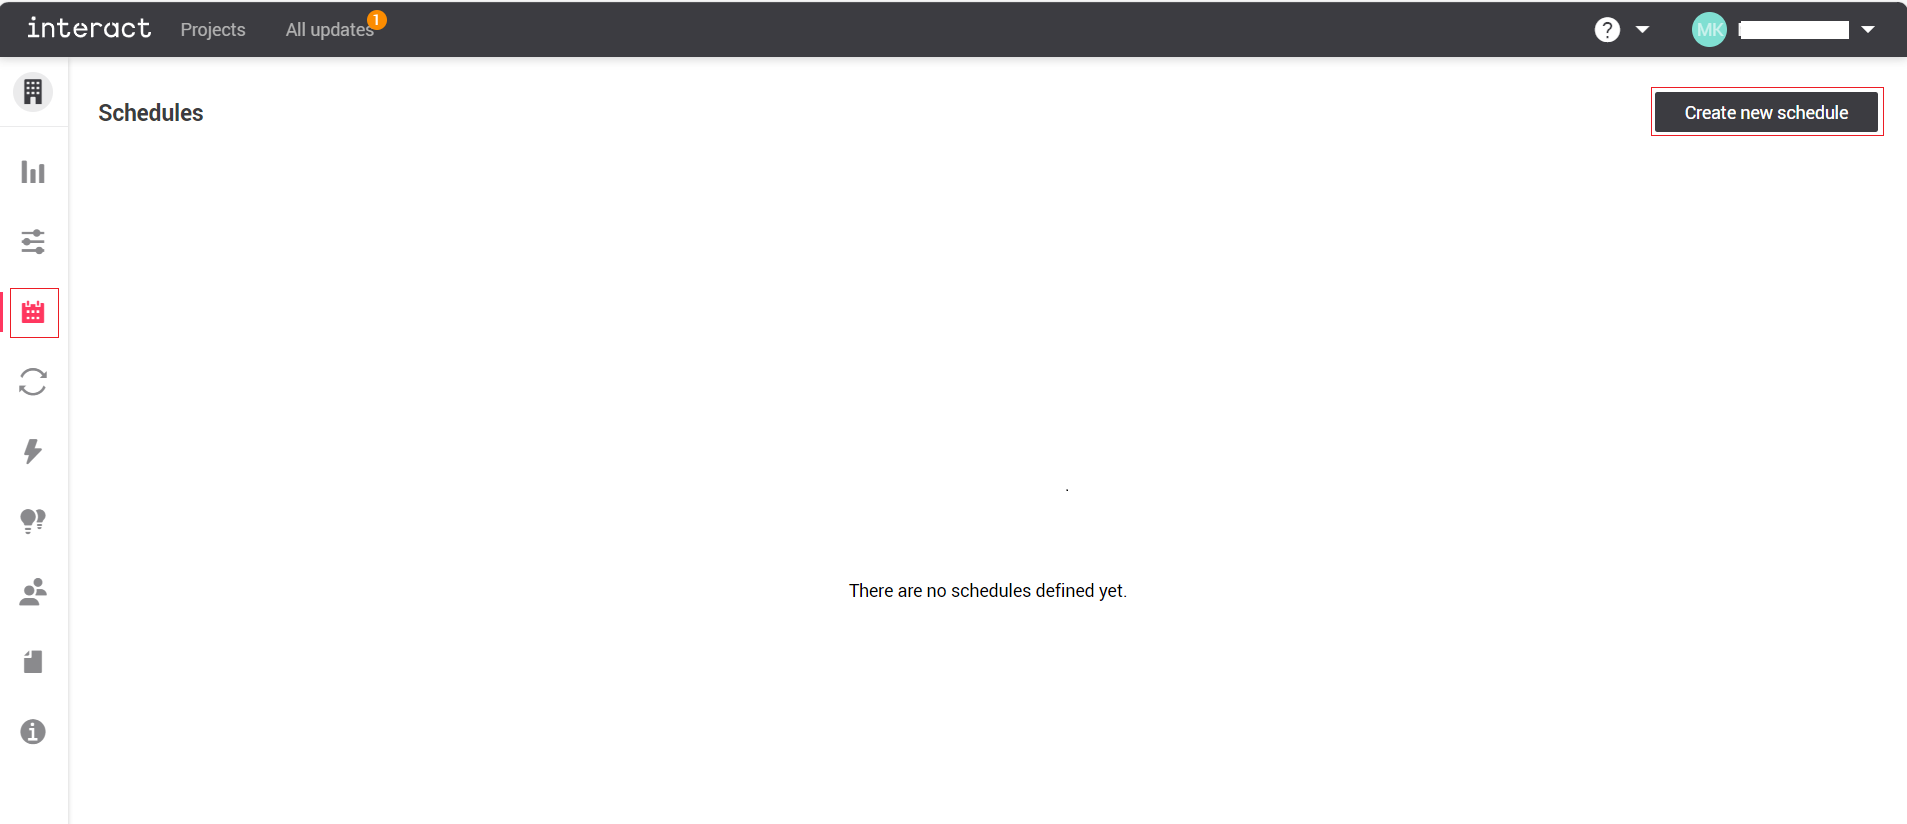
To access schedules, navigate to your project, then click the Schedules icon from the side panel.
-
Click Create new schedule on the top right.
-
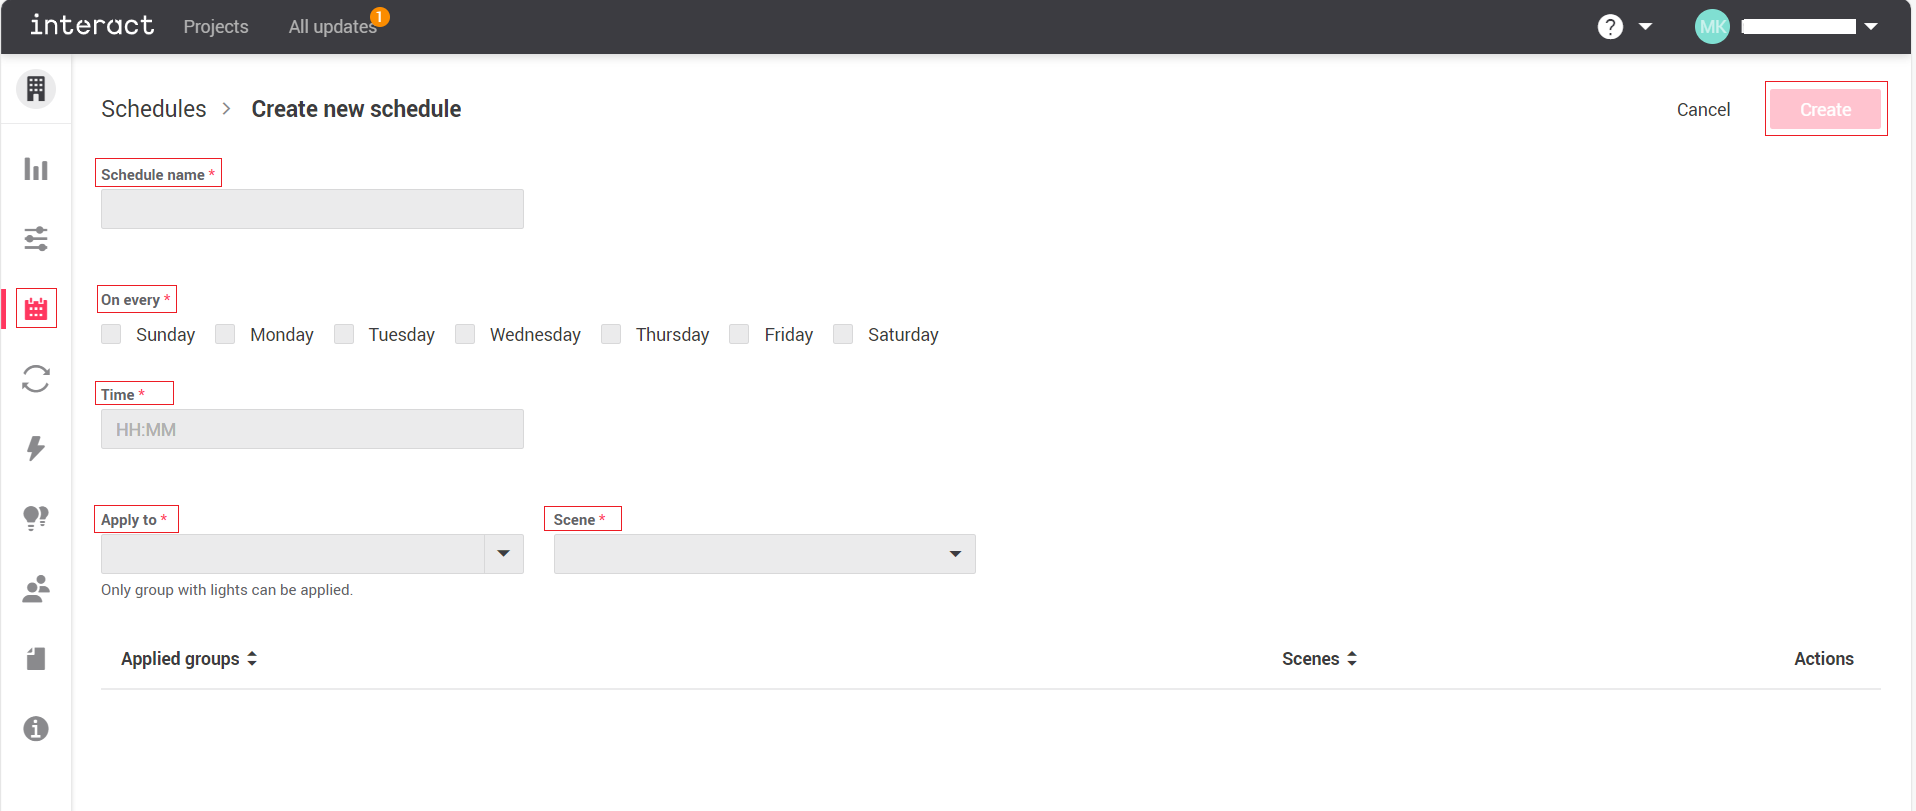
Type a Schedule name, then click the appropriate check boxes for the days of the week you want the schedule to run on. Choose the time in 24-hour format (HH:MM) when the schedule will run. From the Apply to dropdown menu, choose the group for which the schedule applies. From the Scene dropdown menu, choose On, Off or any custom Scene. Repeat the Apply to and Scene drop down selections if necessary for other groups that will be included in this schedule (up to 16). If you add an action for a group by mistake, you can click the trash can icon beside the group in the schedule actions list to remove it from the schedule. When you are finished, click Create on the top right to enable the schedule.
-
To edit a previously created schedule, click on the Schedule icon in the side panel, click the 3-dot-ellipsis beside the appropriate schedule under the Actions column, then click Edit.
-
To delete a previously created schedule, click on the Schedule icon in the side panel, click the 3-dot-ellipsis beside the appropriate schedule under the Actions column, then click Delete.
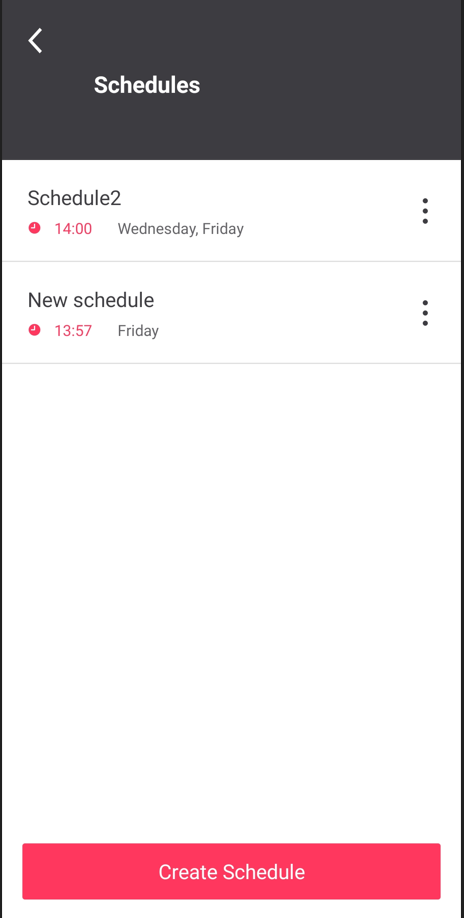
Schedules using the app
-
Navigate to the appropriate project, then tap Schedules from the main project screen.
-
Tap Create schedule.
-
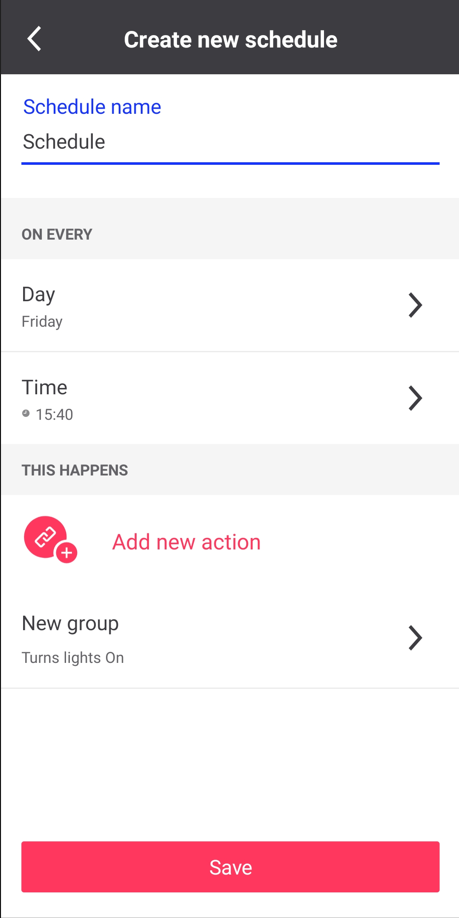
Type a Schedule name, then tap Day.
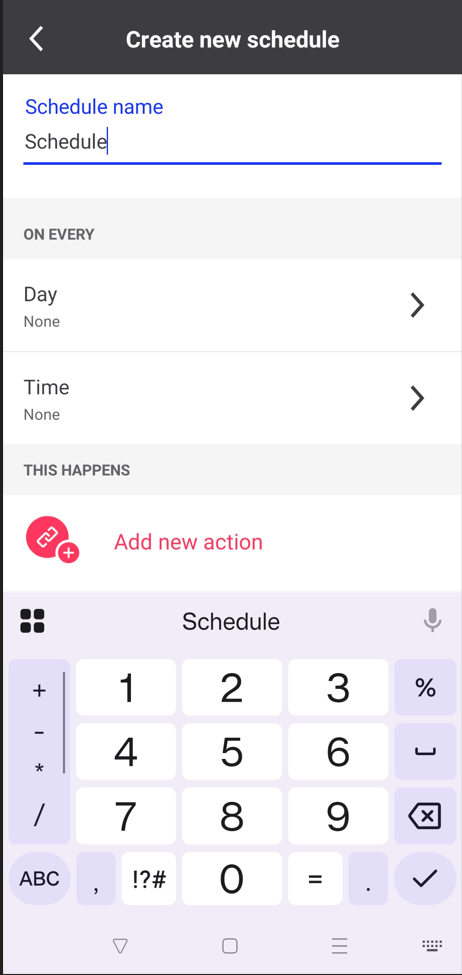
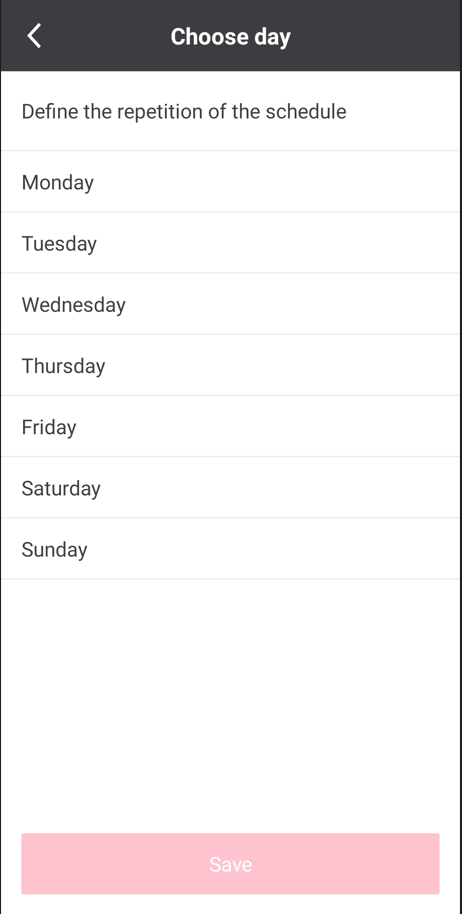
-
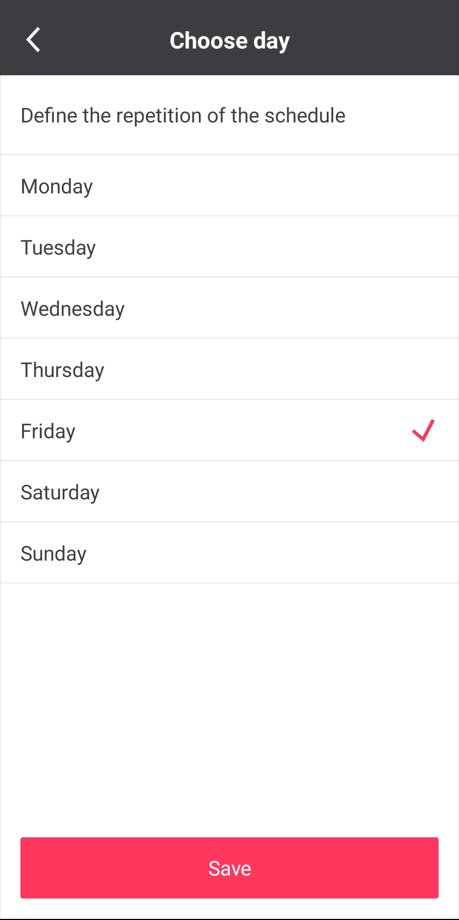
From the Choose day screen, tap to select or de-select the appropriate days of the week you want the schedule to run on, then tap Save.
-
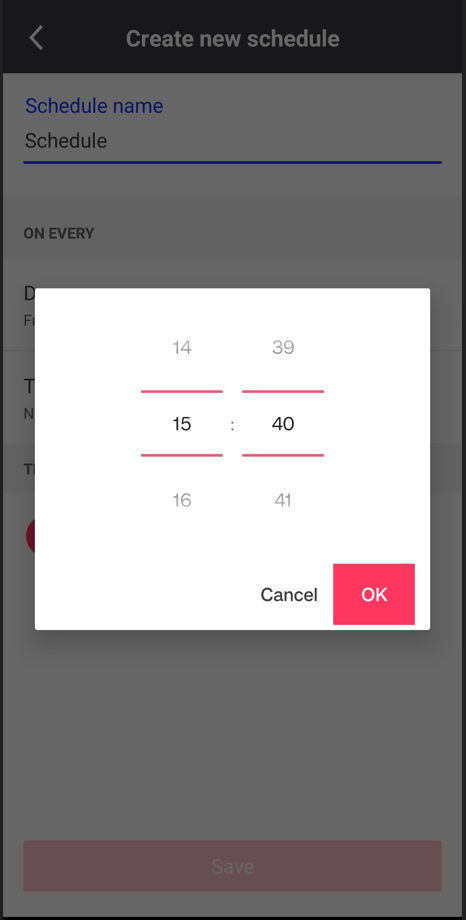
Tap Time and choose the time in 24-hour format (HH:MM) when the schedule will run, then tap OK.
-
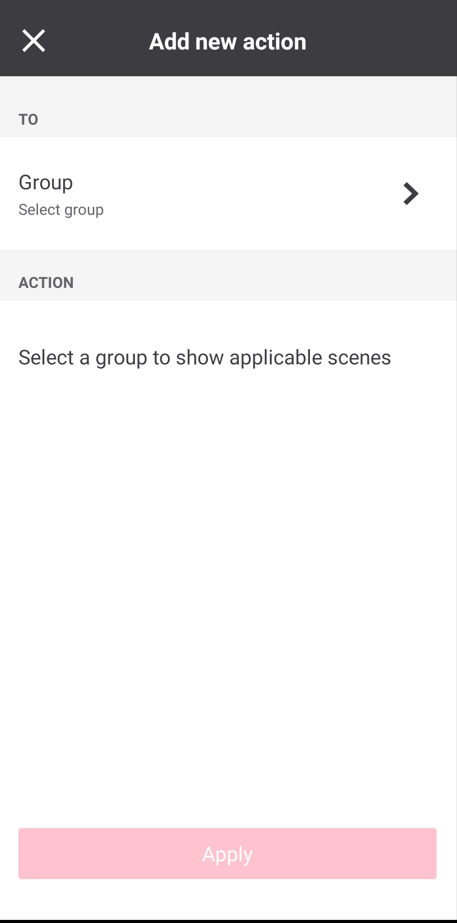
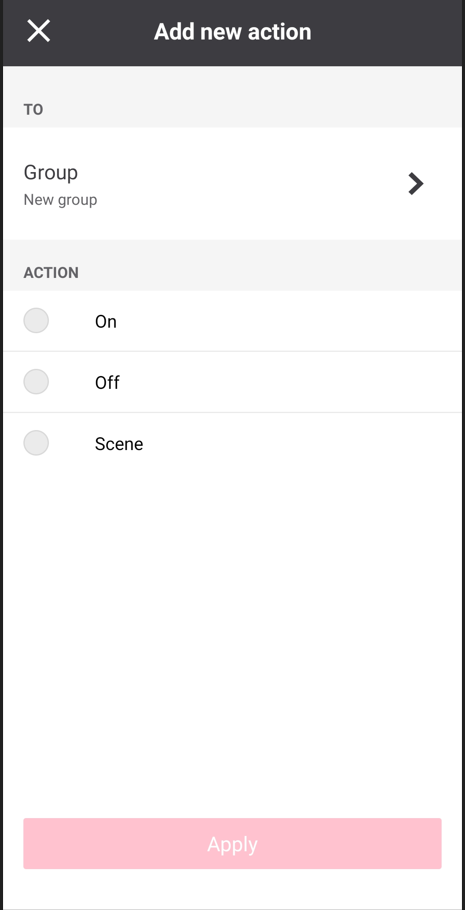
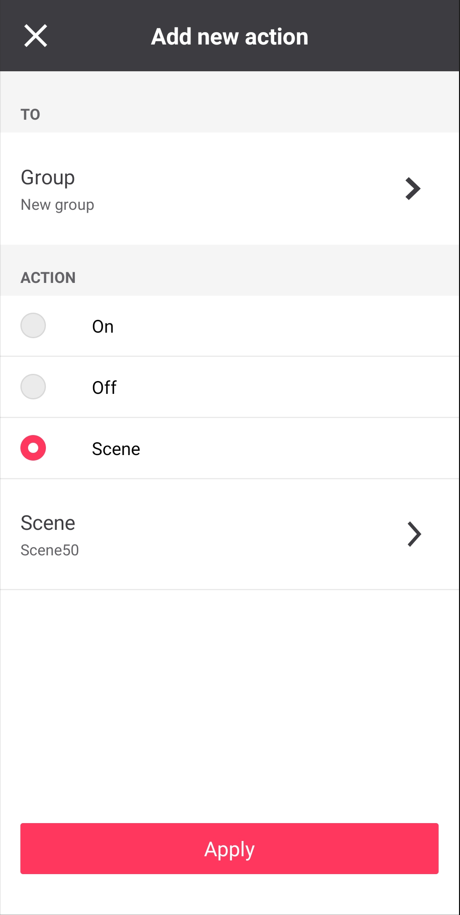
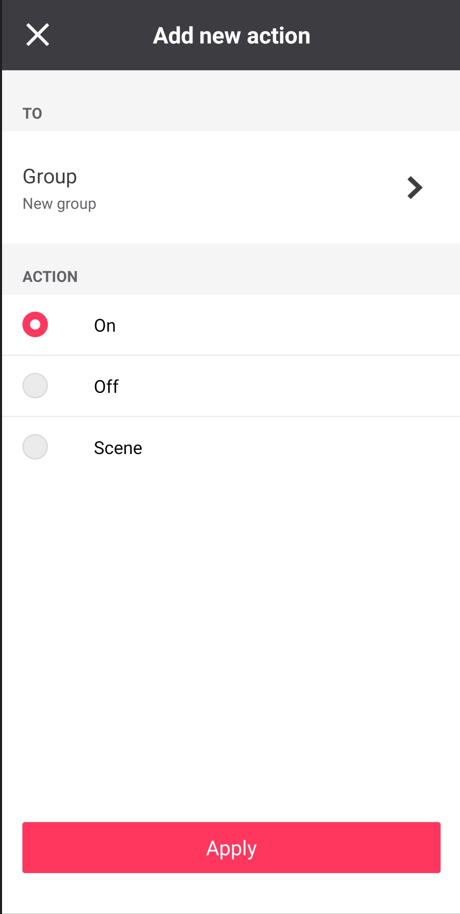
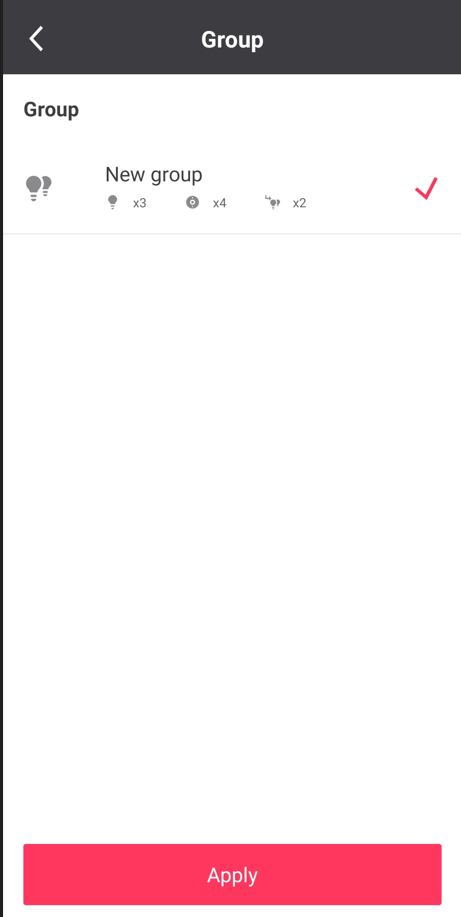
Tap Add new action. On the Add new action screen, tap Group, tap the group for which the schedule applies, then tap Apply.
-
Tap which action will be assigned to the group (On, Off, Scene). If a Scene is selected, tap the Scene selection and choose which scene will be assigned to the action.

-
Finally, tap Apply. If additional group actions are required for the schedule, repeat the process starting by tapping Add new action.
-
To edit a previously created schedule, tap on Schedule in the main project screen, tap the three-dot-ellipsis beside the appropriate schedule, then tap Edit schedule.
-
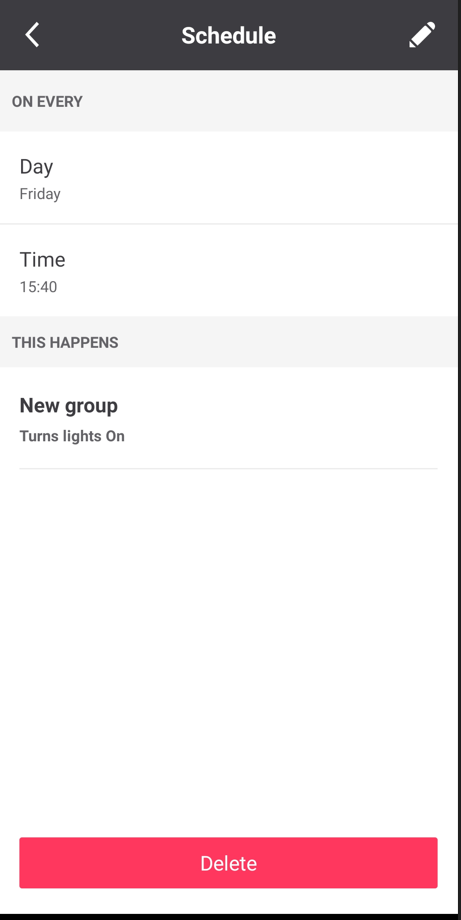
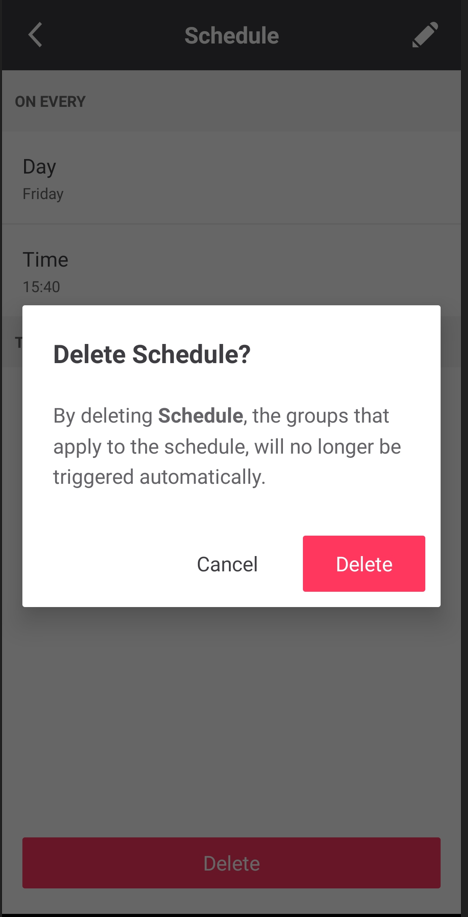
To delete a previously created schedule, tap on Schedule in the main project screen, tap the three-dot-ellipsis beside the appropriate schedule, then tap Delete schedule.