Project updates using the portal
Project updates allow the smart lighting system to enable new system features and functionalities as they become available. Project updates are important to complete once commissioning is completed, as well as after commissioning when new updates become available, to ensure that the smart lighting system stays up to date with the latest features, functionalities, security updates and bug fixes. Project updates:
-
Update firmware to the latest available version. This can be gateway firmware only, light firmware, or both.
-
Update device project settings and groups to the latest available version. This will migrate each light and group’s configuration settings to enable support for the latest features and functionalities of the system.
Project updates require all lights added to the project to be reachable during the update. Lights that are offline or are unreachable over Zigbee during an update via a gateway will result in a failure to fully update the project. To prepare an Signify Interact Builder project for a successful update, follow these tips before initiating a project update:
-
Force delete (remove) non-existing lights: Use the app to force delete any lights that no longer exist in the project. This includes lights that have been replaced, moved, or factory reset.
-
Check for unassigned lights: Ensure that all lights are assigned to the appropriate group. Unassigned lights can cause issues with updating project settings. Check the Lights tile in each Network page in the project and ensure there are zero unassigned lights. If there are unassigned lights found, either assign them to the appropriate group, or delete them from the project.
-
Power cycle all lights: Turn off power for at least 10 seconds, then re-energize the lights. After a power cycle, make sure all lights are energized and remain so during the project update process. Avoid any interruptions such as circuit breakers being turned off or existing systems cutting power to the lights.
-
Power cycle all gateways: Turn off power for at least 10 seconds, then re-energize the gateways. After a power cycle, wait at least 5 minutes for all gateways to boot up before checking gateway status. Ensure the gateways stay energized and have a stable internet connection during the project update process. Ensure each gateway is physically installed within range of at least two lights in the wireless network that it needs to update.
-
Check gateway status: Gateway connection status can be confirmed using the Signify Interact Builder web portal or app:
-
Using the portal: Navigate to the project and click the Installation setup page from the side panel. Check that all wireless networks with gateways have a 'Connected' gateway status.
-
Using the app: Navigate to the project Setup screen, then enter each network with a gateway one by one. In the Network screen, tap the Gateway tile. Each gateway should report a 'Connected' status.
-
-
Limit interference: Reduce or eliminate sources of interference, such as other 2.4GHz devices (Bluetooth, ZigBee, Wifi, microwave oven…), to ensure smooth communication during the update.
-
Handle new devices with low firmware versions: If new lights with a very low firmware version are added to the system, delete them before performing the update on devices with higher versions. Add them back after the update and update them again.
By following these steps, you can improve the likelihood of a successful project update process.
Project updates can be initiated using the Signify Interact Builder web portal or app.
To initiate a project update using the web portal:
-
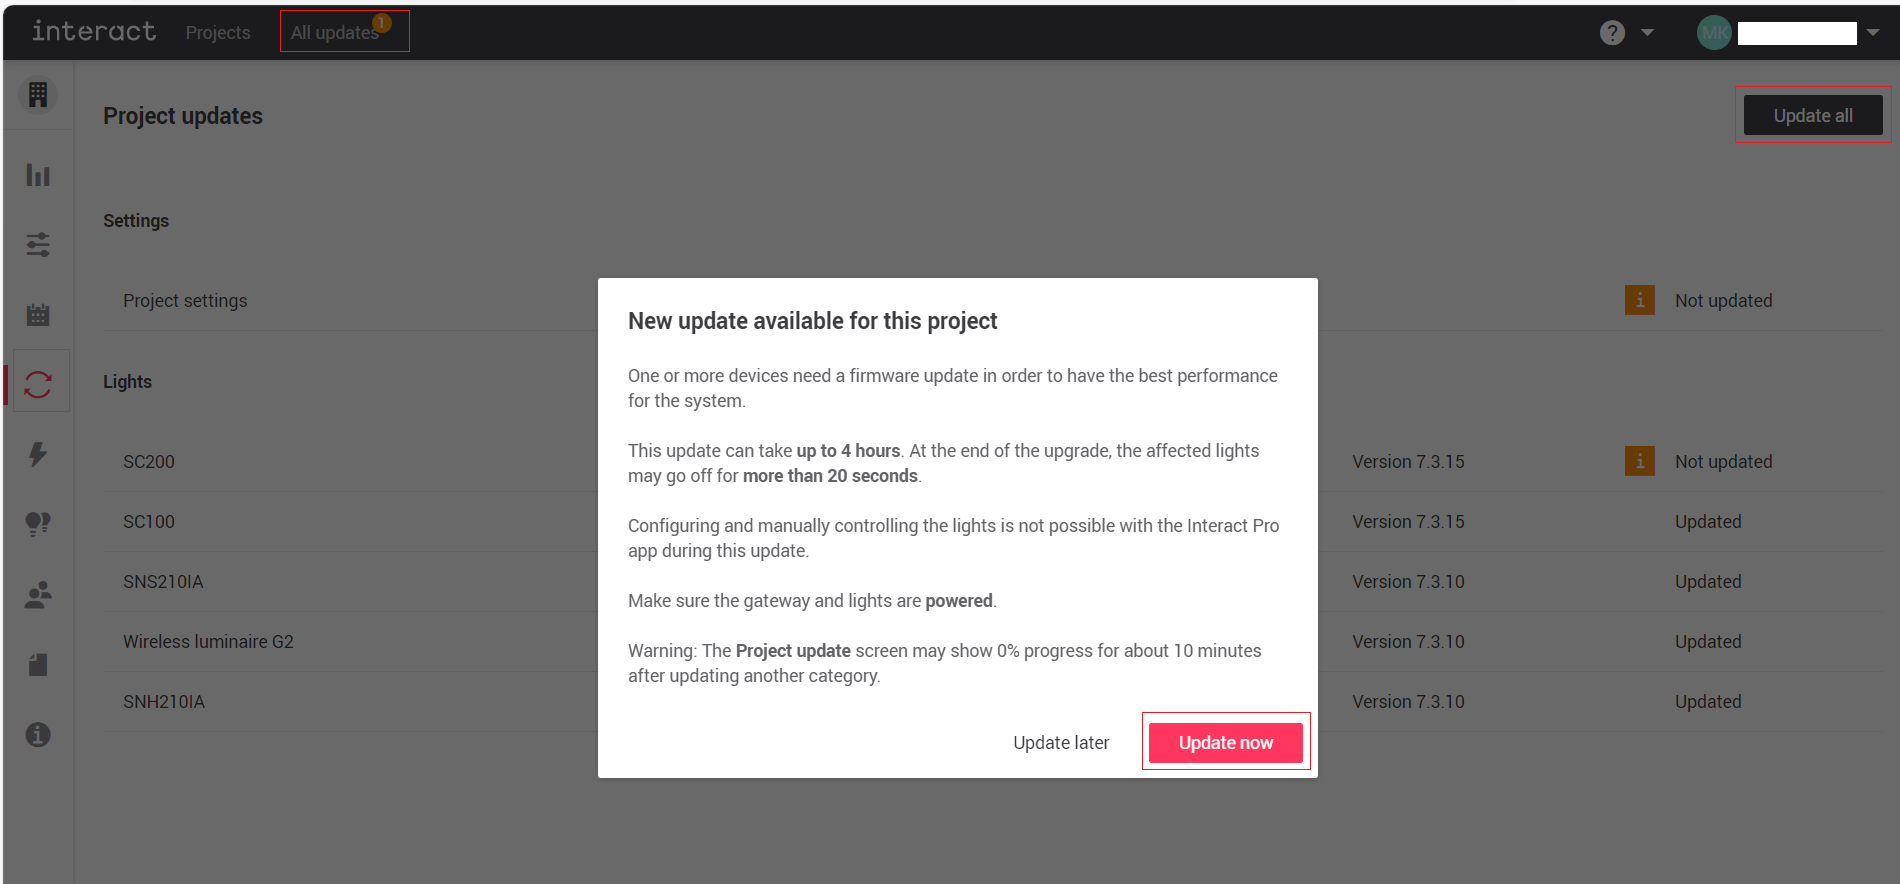
Navigate to the appropriate project, then click the Project updates icon from the side panel. If a project update is available, the New update available for this project page is displayed.
-
Click Update now to initiate the project update. Click Update later if you would like to view more details first.
-
If you closed the New update available for this project page and wish to start a project update, click Update all on the top right to start the project update.
To initiate a project update using the app:
-
Navigate to the appropriate project, then tap Project updates from the main project screen.
-
If a project update is available, the New update available for this project screen is displayed.
-
Tap Update now to initiate the project update. Tap Remind me later if you would like to view more details first.
-
If you closed the New update available for this project page and wish to start a project update, tap Update on the Project updates screen to start the project update.