Create a project - portal
-
Open the web portal with the link: https://sme.interact-lighting.com . Log in with your email address and password.
-
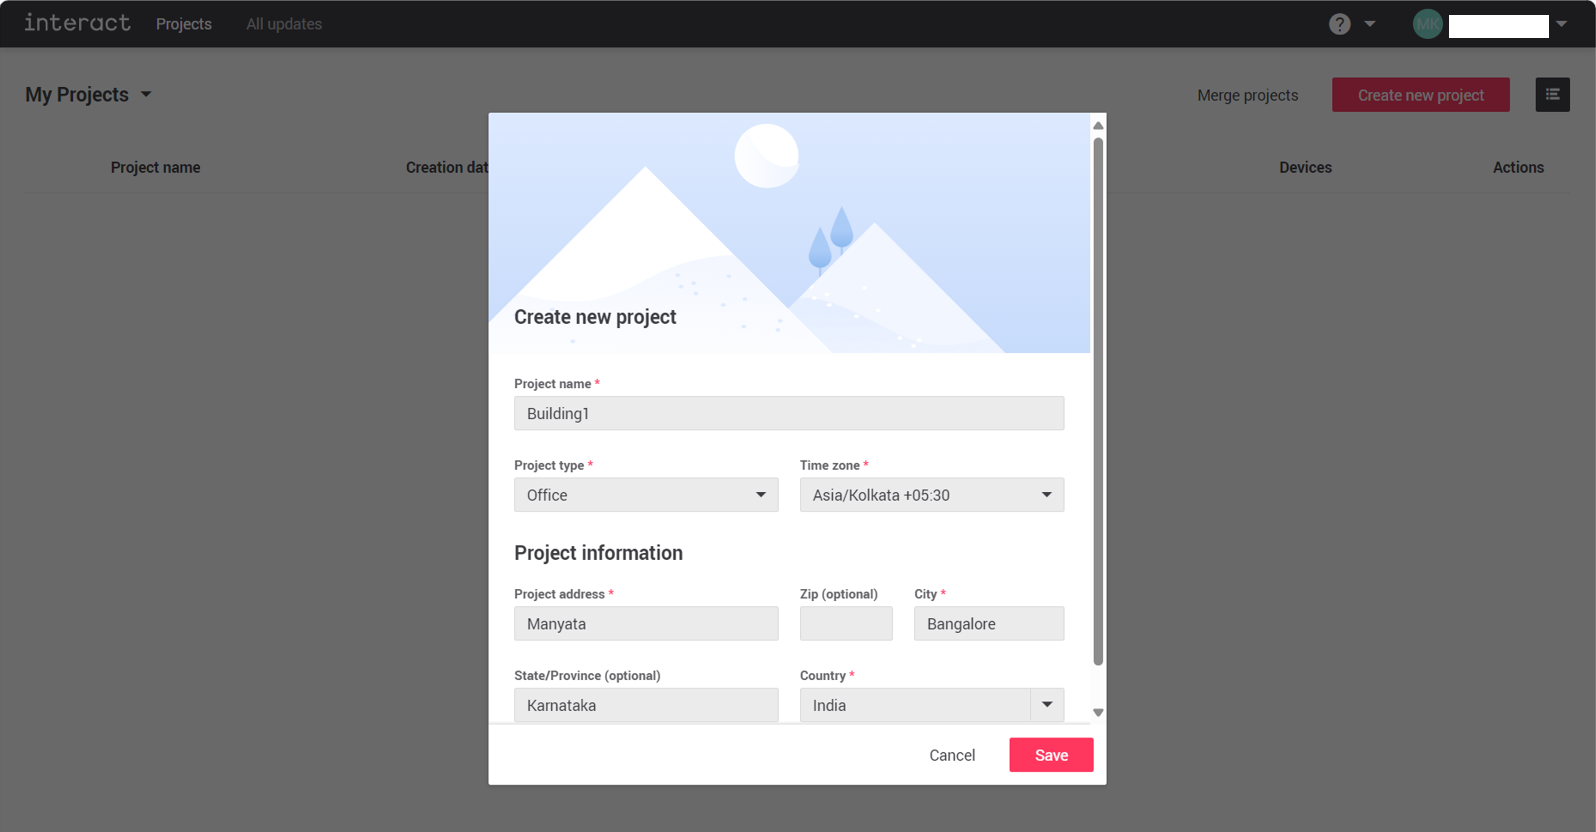
From the My Projects dashboard, click Create new project on the top right.
-
Fill in the project details as prompted and click Save.
-
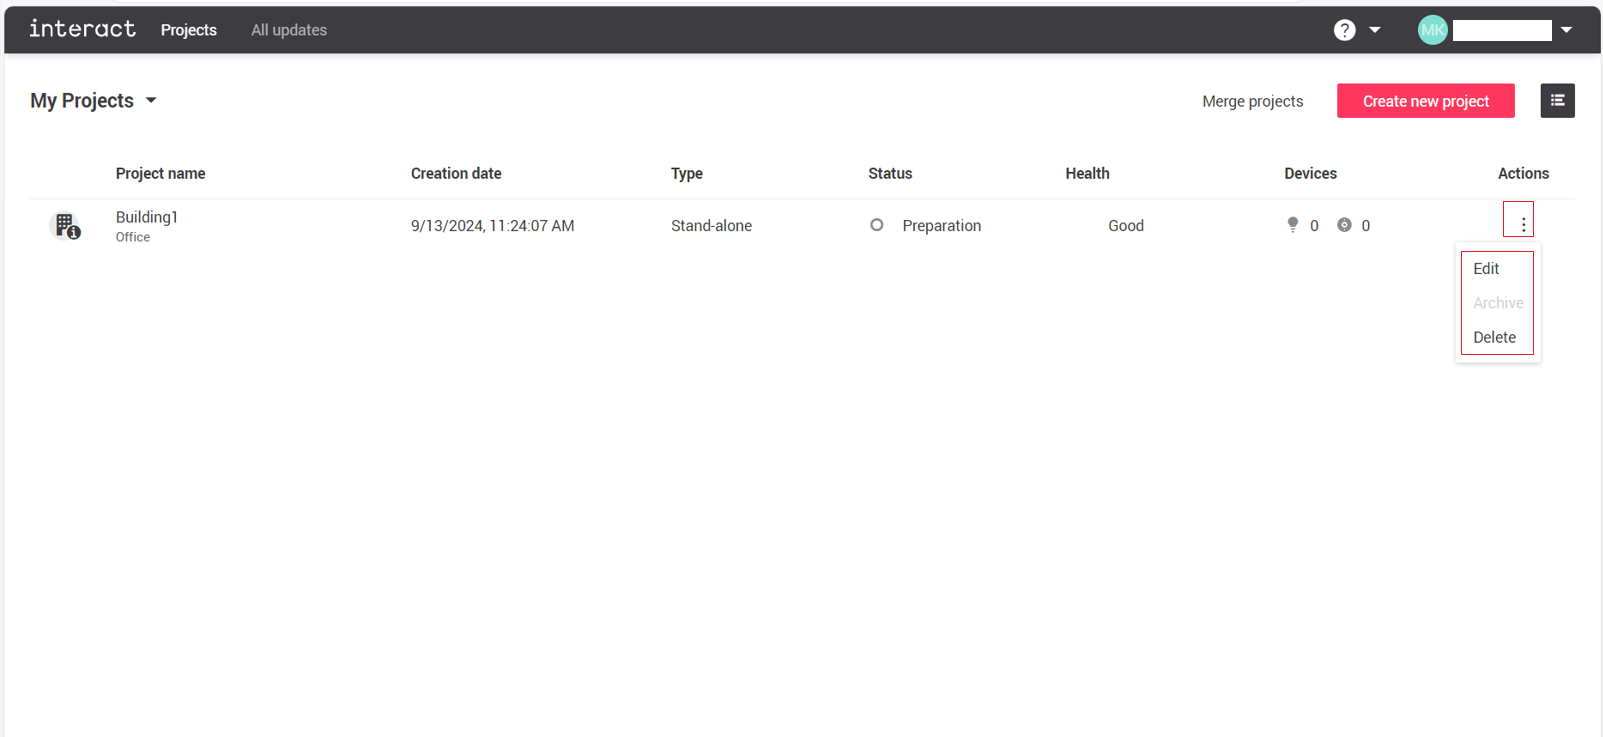
These details can be edited from the My Projects dashboard at a later stage, if needed, by clicking the 3-dot-ellipsis beside the project, then clicking Edit.
-
From the My Projects dashboard, click the project name. Entering a new project brings you to the Installation setup page. Use the side panel on the left side of the page to navigate to various pages within the project. The side panel is expandable and collapsable for your convenience.
Create a network
-
From the Installation setup page, new experts are encouraged to click View instructions. The resulting pages guide experts through a series of network instructions. Once networks are created, these instructions are accessed by clicking Setup instructions on the Installation setup page.
-
From the Installation setup page, click Create network.
-
Type a name for your network, select an appropriate Zigbee channel, then click Create network.
Pay attention to the note under the Zigbee channel selection drop down menu and take care to avoid using the same Zigbee channel for physically adjacent networks in your project. This will avoid scenarios where too many nearby networks are using the same Zigbee channel, which can cause wireless interference in certain cases. 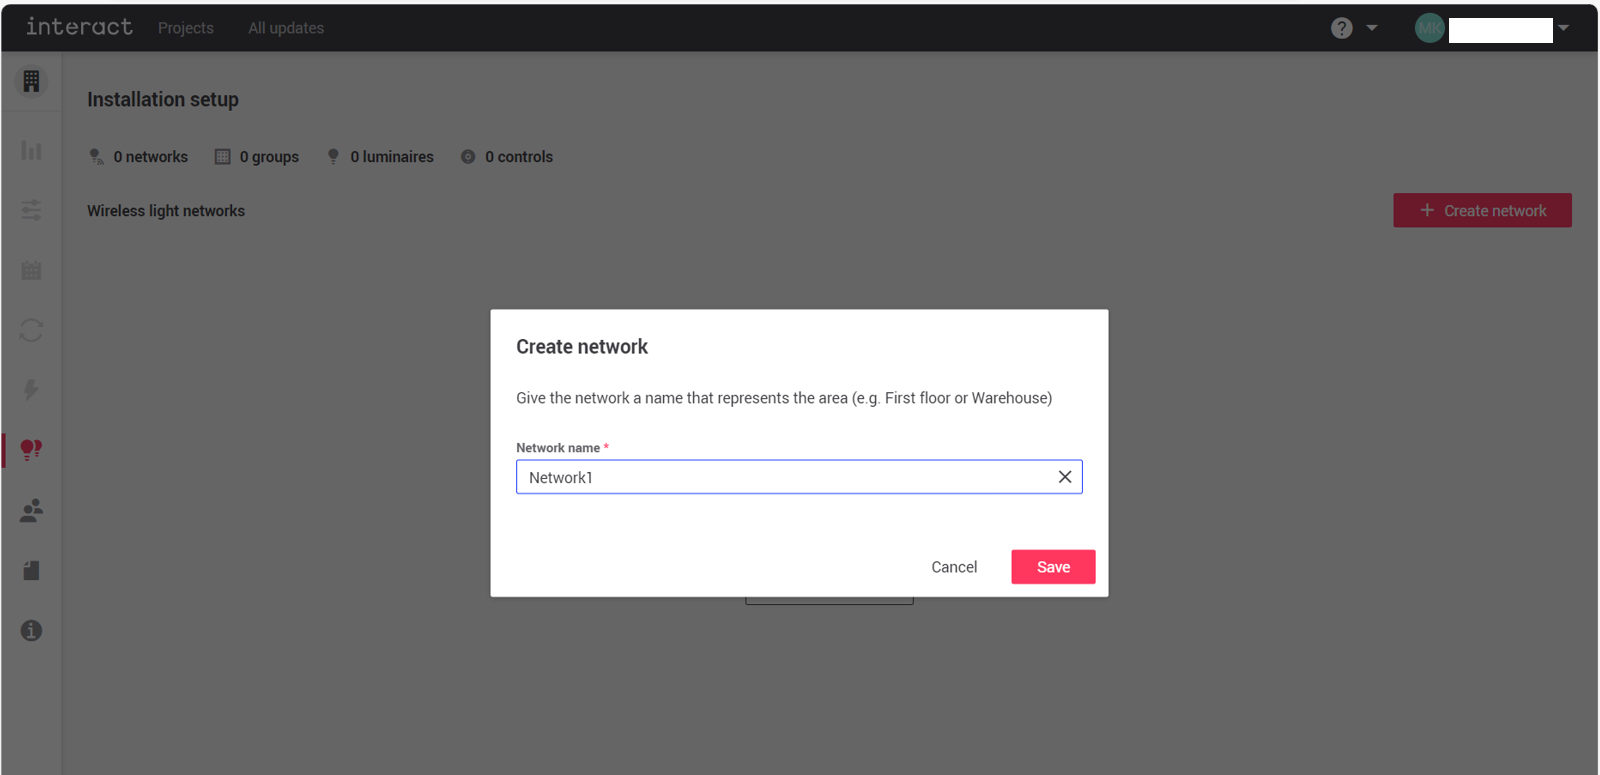
-
Networks can be renamed or deleted at a later stage, if needed, by clicking the three-dot-ellipsis on the right side of each network.
Networks can only be deleted from the web portal if there are no devices in the network. If there are devices in the network, they must first be deleted before the network itself can be deleted. 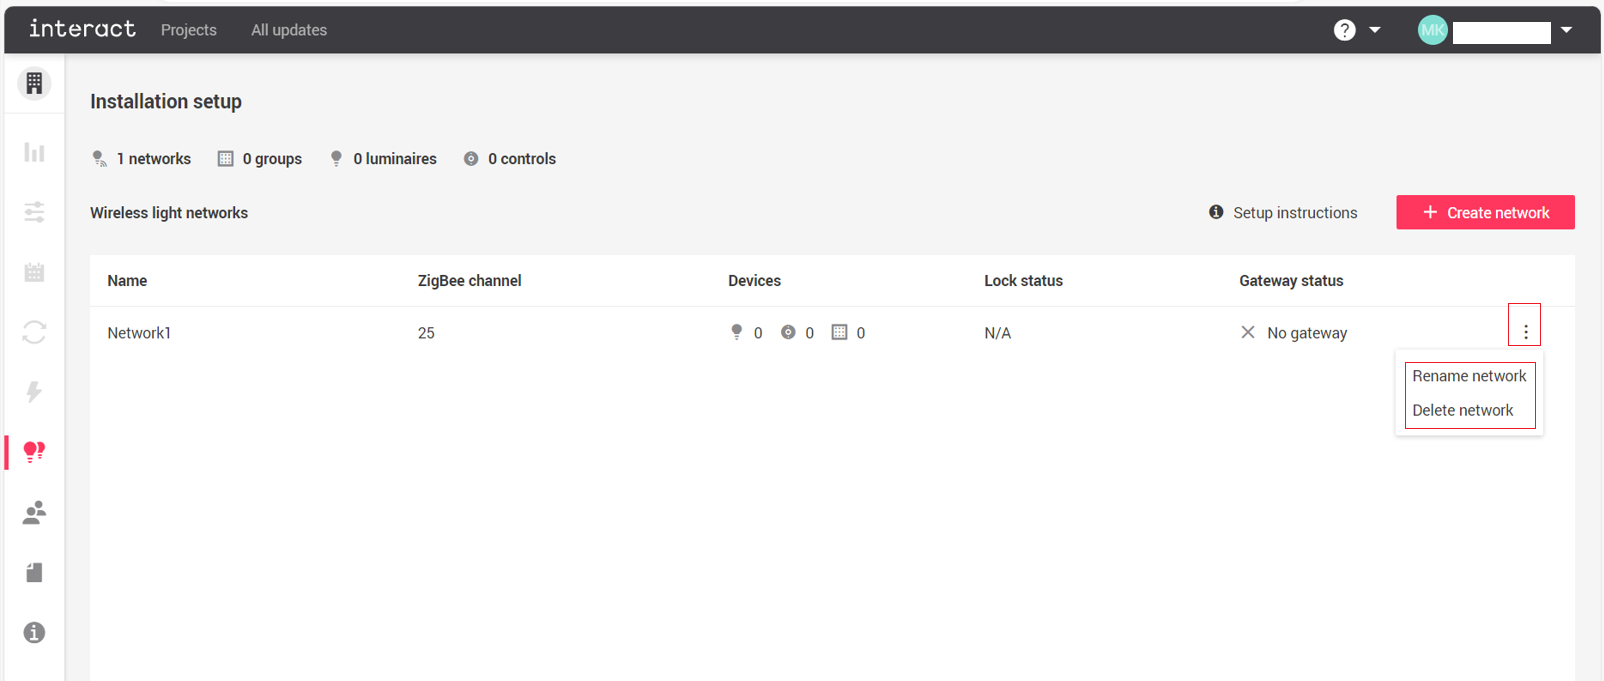
Create a group
-
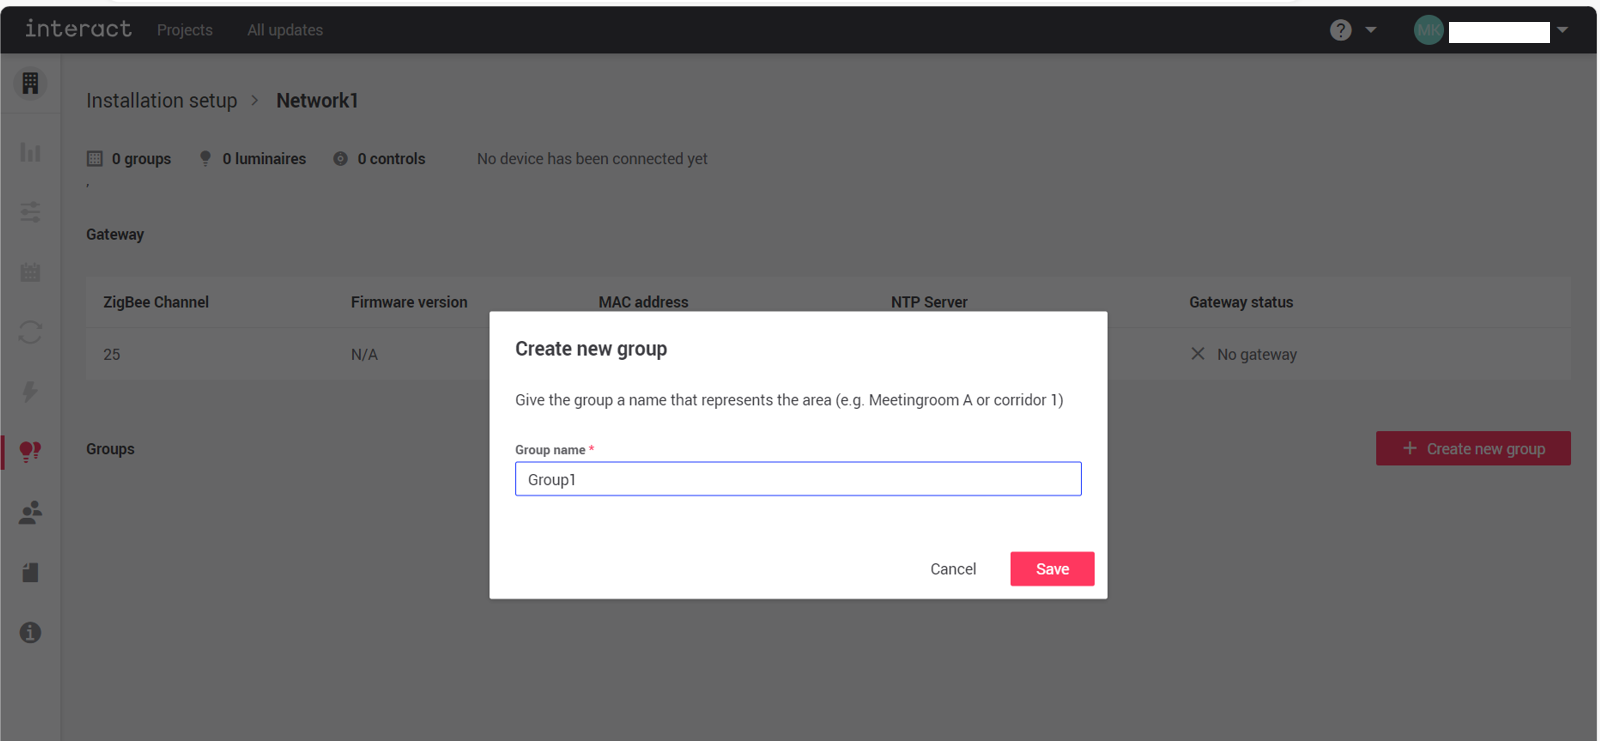
Clicking a network on the Installation setup page brings you into the network page. New experts are encouraged to click View instructions. The resulting pages guide experts through a series of grouping instructions. Once groups are created, these instructions are accessed by clicking Setup instructions on the Network page.
-
Inside the network, click Create new group.
-
Type a name for your group and click Save.
-
Groups can be renamed or deleted at a later stage, if needed, by clicking the three-dot-ellipsis on the right side of each group.
Create a zone
-
Clicking a group on the network page brings you into the group page. Hover the cursor over the Info icons to review the difference between lights in a group that are in a zone vs not in a zone. Creating a zone is optional but is mandatory if you want to use Daylight Dependent Regulation (DDR) in the group.
-
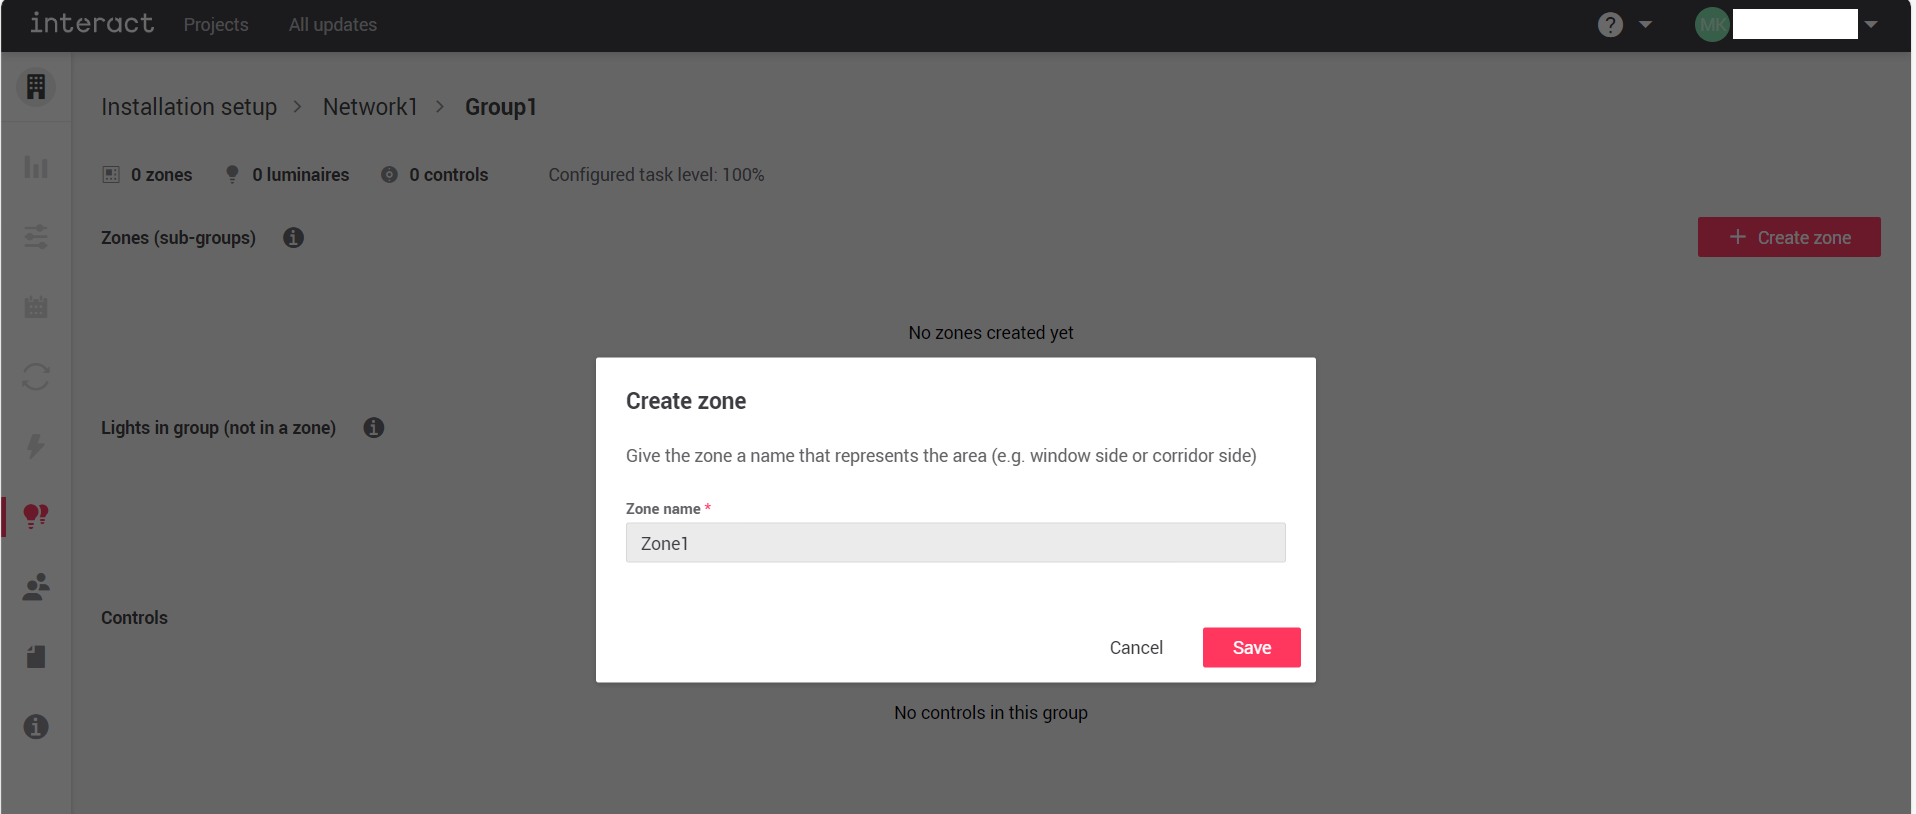
Inside the group, click Create zone.
-
Type a name for your zone and click Save.